Mine do not sit in the rubber bumper.openspaces wrote:Just installed mine today.
Question on hte install.
Do hte top caps nest into the existing rubber bumper? Mine don't and just wanted to make sure this is expected.
Installing the AirLift 1000
Moderator: volvite
-
openspaces
- Posts: 36
- Joined: Sun Jun 06, 2010 6:12 pm
Mine have been in 1 day. I put mine at 20 and the ydropped ot 19.5 after one day. I'm pretty sure htey'll take a set and the nhold constant, but only time will tell.wiegs wrote:I installed mine a couple days ago. Put 10psi in and when I checked the the pressure today, I was at 9psi. Are you suppose to lose some pressure? All my fitting are good.
Did your top plactic pieces nest into the rubber bumpers on the spring pack?
It looks like mine is sitting on the spring isolator. As far as the air pressure, if I check the air a little gets out, it really changes the pressure by at least 1psi. Seems like it does not take much. I put 20psi today. If it drops 4 or 5 psi, I will be worried about a leak. I would think that if there was a leak it would go down to practically nothing.
-
JAHBLESSINGS
- Sponsored Member
- Posts: 1400
- Joined: Mon Oct 13, 2008 1:36 pm
- Location: 90 DEGREES FLORIDA
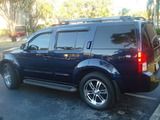
Finally got around to installing mine. I managed to run everything without pulling rear tires or dropping spare. I also went a different route for the valve as you can see in the pic. I like the idea of the valve being out of the weather and with my 12v air compressor this is pretty convenient.

Really haven't driven it yet but will put about 60 miles on it tomorrow. Sits pretty with 10psi....no more saggy butt
Really haven't driven it yet but will put about 60 miles on it tomorrow. Sits pretty with 10psi....no more saggy butt
What about when you have a heavy load in the cargo compartment or do you envision only needing the bags for towing?skinny2 wrote:Finally got around to installing mine. I managed to run everything without pulling rear tires or dropping spare. I also went a different route for the valve as you can see in the pic. I like the idea of the valve being out of the weather and with my 12v air compressor this is pretty convenient.

Mine is installed finally, got around to it this morning, then took a brief 5 miler.. Like everyone else, money VERY well spent... in shock actually because I didn't think airbags could do this.. I thought I'd be bouncy (I'm at 10.2 psi (digital gauge)). Going to ramp up to 12 tomorrow for the 75 mile r/t commute, and finally, on Friday, up it to tow the quads out to the OTHER side of P/A, about 5.5hrs worth... My final test.
1) Do it, do not hesitate. This purchase imho is worth $200.00 and only spent $95.00
2) Use the "tee", and use silicone spray to get hoses onto the fittings easier.
3) There is no more 3
4) Drop the spare, trust me. Also, Jack up truck, one side at a time (set parking brake genius). It will ABSOLUTELY help you attach the hose to the actual airbag fitting when the time comes.. (You cannot trust me enough on this, I struggled quite a bit before I finally broke down and did it, and no, I did NOT remove tires)
5) "Zip" ties (electrical ties, oh$h!t ties, depends on your geo-locale) , use 'em. Nothing like doing a neat job....
I'll post a pic of the finished adapter I kidnapped from some loose parts, it looks damn near STOCK if I don't say so myself..
6) Happy Fathers Day guys.....
7) I promised my girlfriend I wouldn't type all this before our trip to Stony Point NY in about 20 minutes... ahhaa Luv u honey! And I must say, gotta love a woman who can turn a wrench! AR AR AR !!!
Mr Mayor[/i]
1) Do it, do not hesitate. This purchase imho is worth $200.00 and only spent $95.00
2) Use the "tee", and use silicone spray to get hoses onto the fittings easier.
3) There is no more 3
4) Drop the spare, trust me. Also, Jack up truck, one side at a time (set parking brake genius). It will ABSOLUTELY help you attach the hose to the actual airbag fitting when the time comes.. (You cannot trust me enough on this, I struggled quite a bit before I finally broke down and did it, and no, I did NOT remove tires)
5) "Zip" ties (electrical ties, oh$h!t ties, depends on your geo-locale) , use 'em. Nothing like doing a neat job....
I'll post a pic of the finished adapter I kidnapped from some loose parts, it looks damn near STOCK if I don't say so myself..
6) Happy Fathers Day guys.....
7) I promised my girlfriend I wouldn't type all this before our trip to Stony Point NY in about 20 minutes... ahhaa Luv u honey!
Mr Mayor[/i]
-
silver x0ne
- Posts: 31
- Joined: Thu Apr 01, 2010 10:45 pm
- Location: DFW, TX
I just installed mine a bit over a week ago and used it during a camping trip. I have to say it is money well spent. I didn't take tires off, nor did I drop the spare; I simply jacked up the rear via the rear differential.
-Run the line through the top of the arm
-Run the tube through the poly isolator and to the point where you will put the bag in
-Cap one end of the tube
-Connect the tube
-Squeeze most of the air out of the bags and remove/replace the cap on the tube as you do this (this allows the bag to maintain a small profile until you squeeze it in)
-Slip the bag into the spring
-Pull the line through and remove the cap once the bag is in place (so it'll inflate)
-Run the line where it needs to go to the T
-Cut tube and put it on the T
-Repeat for second bag
Do NOT try to put them in and then attach the fittings unless you're removing the spare/tires.
I would say the install was very easy, semi-frustrating because I did not attach the lines until the bags were in (and getting them back out was a no-go) but even so I'd say I finished in an hour and some change. There are questions about the 4x4 aspect but I doubt that matters with this kit (I have a 2008 4x4).
Anyone install these on a 2011?
The instructions say you may need to drill a hole in the top bumper inside the spring. Just wondering if it's true or not? Local auto parts store has them for $135. Debating on waiting until a mid-summer trip to NH, or just paying the premium locally. Shipped cost is pretty much even with local purchase.
Didn't drill anything on mine.
To respond to others above I run about 18psi empty and don't lose any air that I can tell. 18 is nice and firm when empty and I can throw a light trailer on without adding air for a short trip. In fact had a 6,000# trailer on a week ago and didn't air up for a short trip. I was squating but not all that bad.
To respond to others above I run about 18psi empty and don't lose any air that I can tell. 18 is nice and firm when empty and I can throw a light trailer on without adding air for a short trip. In fact had a 6,000# trailer on a week ago and didn't air up for a short trip. I was squating but not all that bad.
-
silver x0ne
- Posts: 31
- Joined: Thu Apr 01, 2010 10:45 pm
- Location: DFW, TX
Re: Anyone install these on a 2011?
No holes to drill that I saw (on an 08 anyway).Milkman wrote:The instructions say you may need to drill a hole in the top bumper inside the spring. Just wondering if it's true or not? Local auto parts store has them for $135. Debating on waiting until a mid-summer trip to NH, or just paying the premium locally. Shipped cost is pretty much even with local purchase.
Hmm, I bought mine on Amazon with 2 day shipping upgrade and paid like $105-110.

Find Your Forum!