color match headlights
Posted: Mon Mar 13, 2017 11:05 am
Color match headlight process, where I also added colorswitch leds. Tell me what yall think!
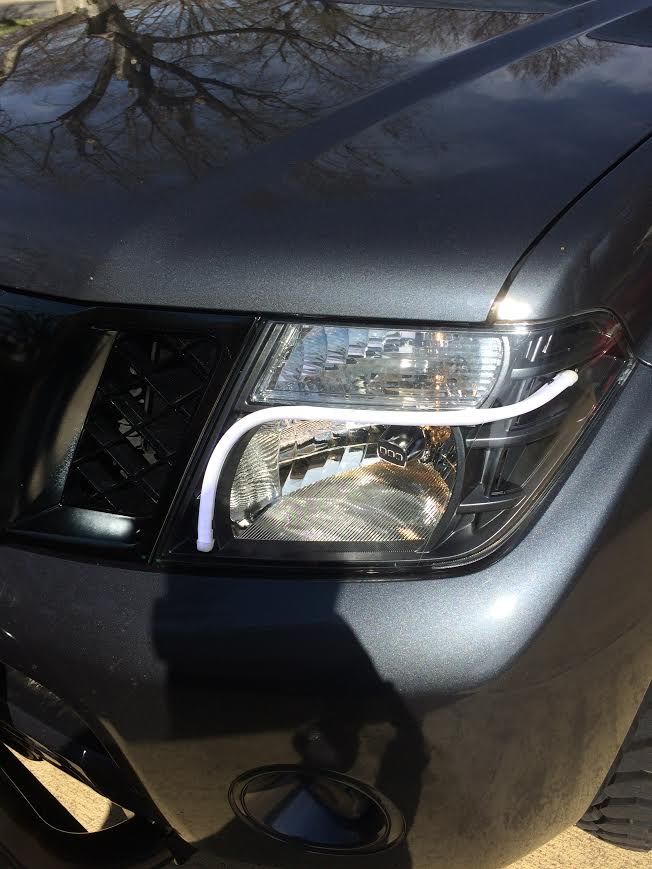
finished project (lights off during the day)
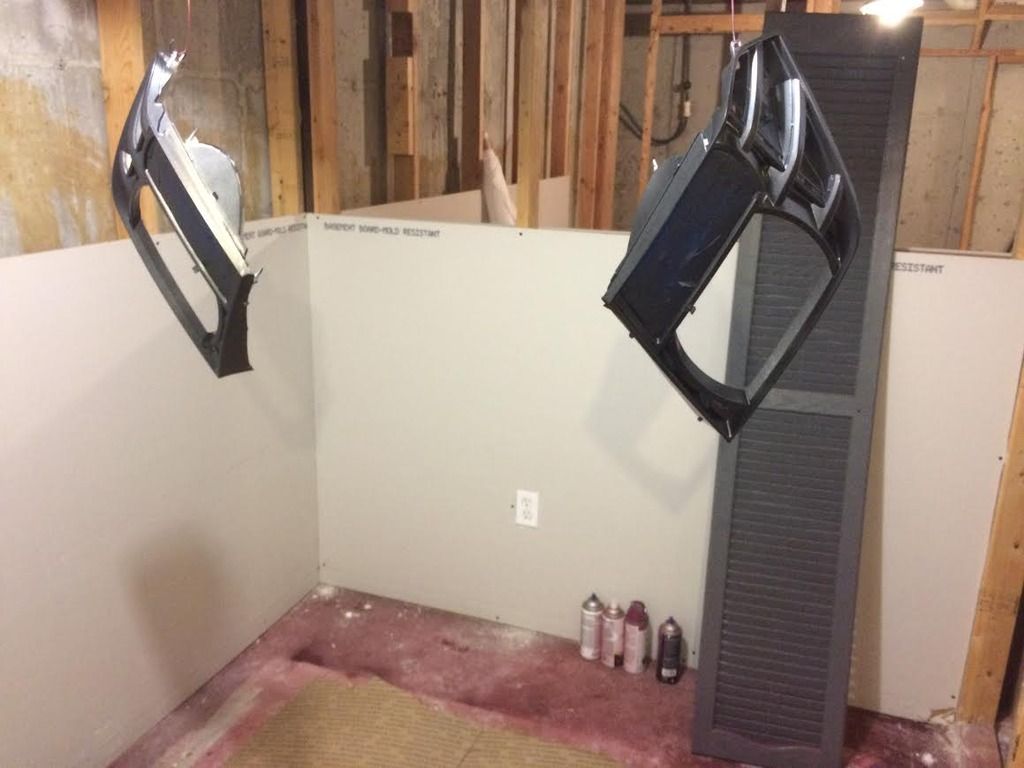
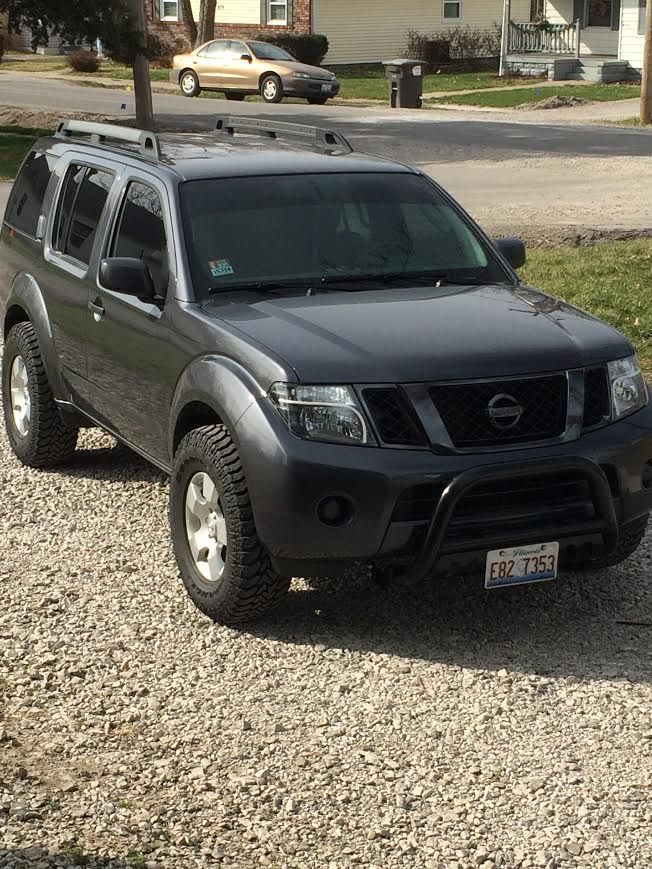
Started by pulling the headlights out. A huge pain BTW. you have to take out the grill first which is just clipped in. Then theres 3 main 10mm bolts in the front of the headlights and 1 more you have to access by taking the bottom 2 phillips screws out of the front fender liner and reach your arm way up in there to feel around and find it. My Pathy is dark slate metallic and I wanted to go with a color match option for a more custom look. I got it on ebay for $8.57 http://www.ebay.com/itm/181810760374?_t ... EBIDX%3AIT Youll have to bake your headlights in the oven to loosen up the gasket around the edges. I used a knife and a flathead screwdriver to pry mine apart. Bake at 220 degrees for 8 mins at a time, and if the gasket/glue hardens back up simply put it back in and let it warm up another 8 mins. I found a video online to help. https://www.youtube.com/watch?v=je5ndoUMEUs
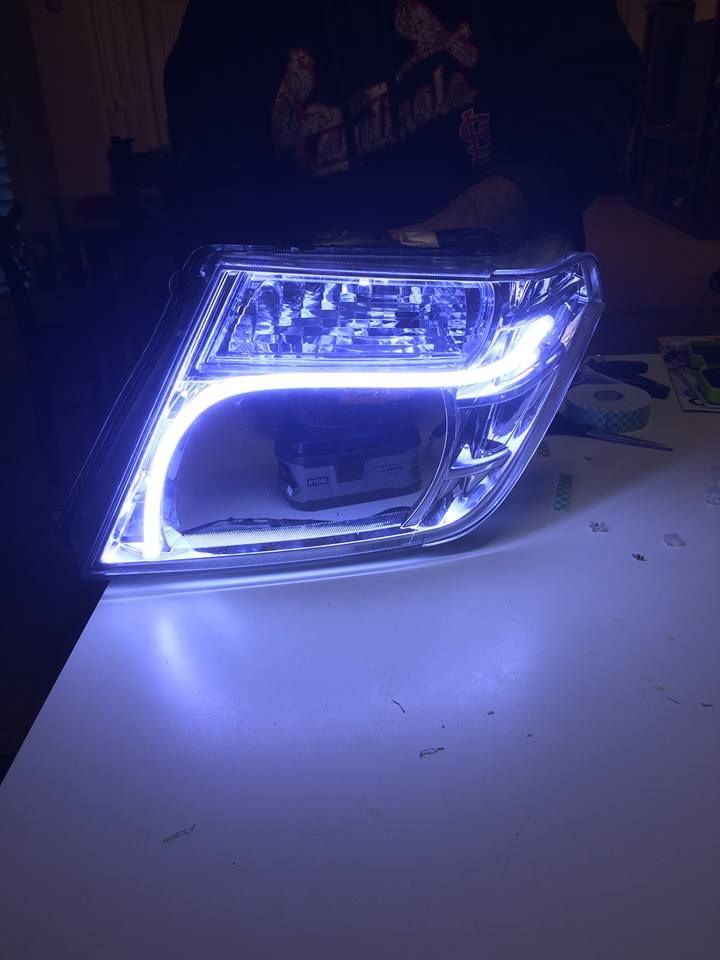
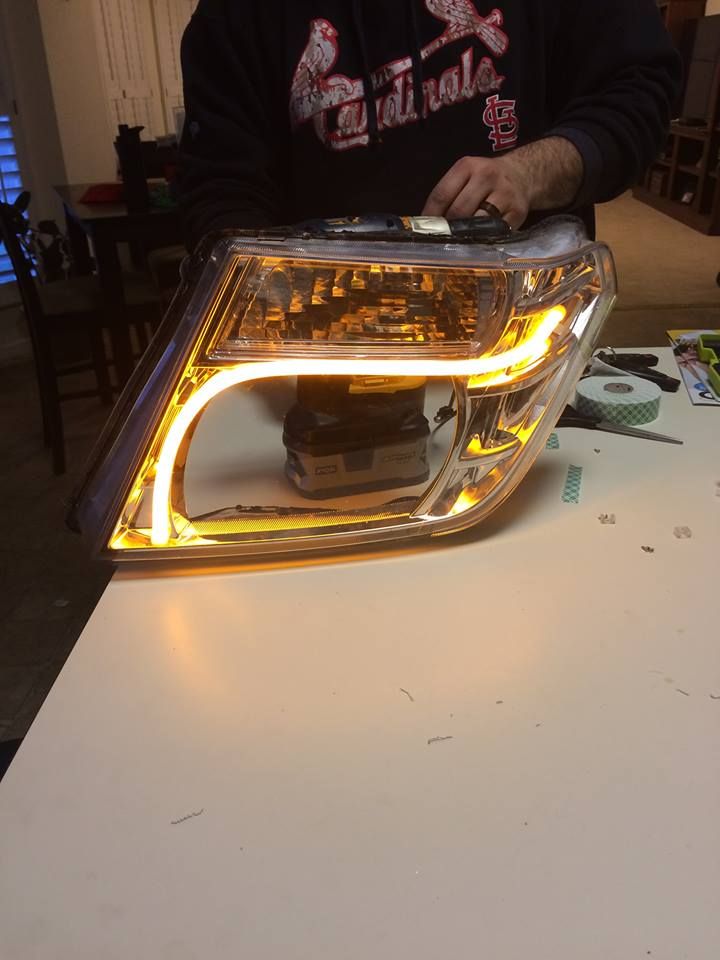
I ordered some switchback leds and was hesitant to add them but finally decided to do it. this was a pain also but I think in the end it was worth it. I went with the 30cm option at $14.99 but there's more options if you want longer strips. I pulled the reflectors out and the corner marker light and left it out (capped it off) I ran the positive and neutral out of that hole so I did'nt have to drill any more holes in the lights. Worked out really good. The led is held in by TINY clips. I used 4 in each side which is what it came with. You have to drill a small pilot hole in after measuring before screwing down the clips with the smallest phillips screwdriver you can imagine. CAREFUL the screws strip easily. Then the light strip slides in the clips with a little finessing. We tested these lights before installing with a 12v drill battery. When wiring these in black goes to black, red goes to red and yellow goes to green (at least in my 2012) If you're savy enough you can test the leads with a volt meter or light indicator simply by switching on the blinker to see when you receive power. Yellow on the lights is your turn signal. https://www.amazon.com/AGPtek-White-Amb ... d+tube+car
testing the turn signal on a 12v drill battery
When your paint is dry and you've got your leds in place you can mash your lens and housing back together. once again heat up the glue before you do this at 220 degrees in your oven. I only put the back portion in not the portion with my new leds attached because I did'nt know about the heat on them. I bought a tube of Permatex Ultra grey and used the entire tube to reseal both headlights. Use liberally as you do not want water or condensation inside them.
http://www.oreillyauto.com/site/c/detai ... &ppt=C1984
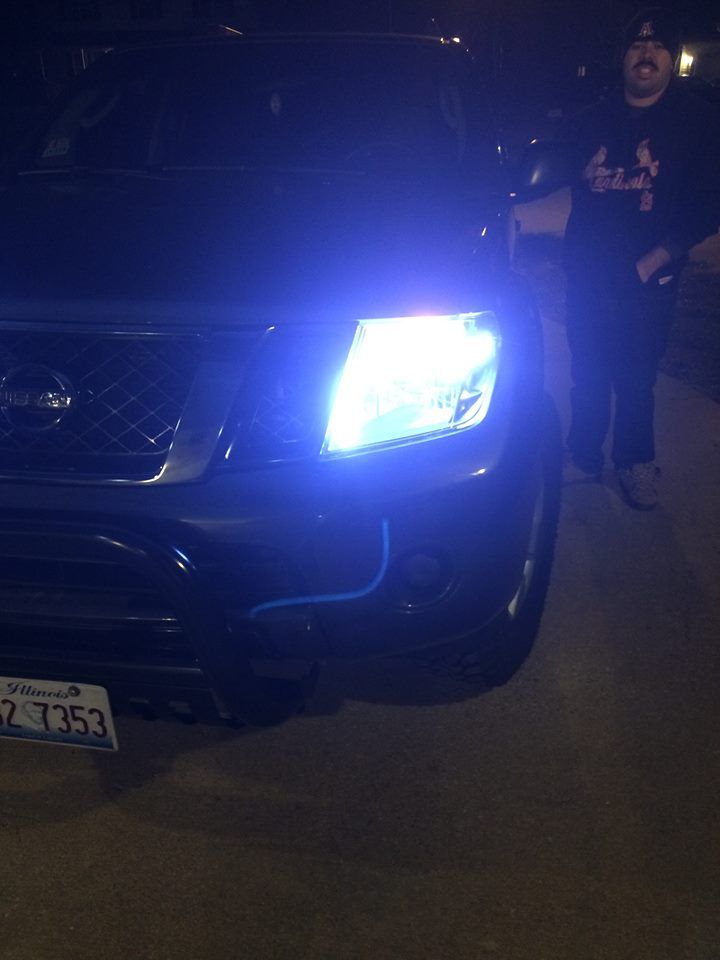
finished lights, note: these arent super bright in the daytime but look amazing at night.
Also want to add that if you want to put LEDs in the original turn signals you will have to add a resistor because of fast flashing. I went with regular filament bulbs just clear instead of amber and got my turn signals to calm down lol
finished project (lights off during the day)
Started by pulling the headlights out. A huge pain BTW. you have to take out the grill first which is just clipped in. Then theres 3 main 10mm bolts in the front of the headlights and 1 more you have to access by taking the bottom 2 phillips screws out of the front fender liner and reach your arm way up in there to feel around and find it. My Pathy is dark slate metallic and I wanted to go with a color match option for a more custom look. I got it on ebay for $8.57 http://www.ebay.com/itm/181810760374?_t ... EBIDX%3AIT Youll have to bake your headlights in the oven to loosen up the gasket around the edges. I used a knife and a flathead screwdriver to pry mine apart. Bake at 220 degrees for 8 mins at a time, and if the gasket/glue hardens back up simply put it back in and let it warm up another 8 mins. I found a video online to help. https://www.youtube.com/watch?v=je5ndoUMEUs
I ordered some switchback leds and was hesitant to add them but finally decided to do it. this was a pain also but I think in the end it was worth it. I went with the 30cm option at $14.99 but there's more options if you want longer strips. I pulled the reflectors out and the corner marker light and left it out (capped it off) I ran the positive and neutral out of that hole so I did'nt have to drill any more holes in the lights. Worked out really good. The led is held in by TINY clips. I used 4 in each side which is what it came with. You have to drill a small pilot hole in after measuring before screwing down the clips with the smallest phillips screwdriver you can imagine. CAREFUL the screws strip easily. Then the light strip slides in the clips with a little finessing. We tested these lights before installing with a 12v drill battery. When wiring these in black goes to black, red goes to red and yellow goes to green (at least in my 2012) If you're savy enough you can test the leads with a volt meter or light indicator simply by switching on the blinker to see when you receive power. Yellow on the lights is your turn signal. https://www.amazon.com/AGPtek-White-Amb ... d+tube+car
testing the turn signal on a 12v drill battery
When your paint is dry and you've got your leds in place you can mash your lens and housing back together. once again heat up the glue before you do this at 220 degrees in your oven. I only put the back portion in not the portion with my new leds attached because I did'nt know about the heat on them. I bought a tube of Permatex Ultra grey and used the entire tube to reseal both headlights. Use liberally as you do not want water or condensation inside them.
http://www.oreillyauto.com/site/c/detai ... &ppt=C1984
finished lights, note: these arent super bright in the daytime but look amazing at night.
Also want to add that if you want to put LEDs in the original turn signals you will have to add a resistor because of fast flashing. I went with regular filament bulbs just clear instead of amber and got my turn signals to calm down lol