Air Lift 1000 Install With Pictures
Posted: Tue Dec 09, 2014 4:34 pm
I finally got around to putting my set of Air Lift 1000s in and figured I'd share some pics of my install in case anyone was interested.
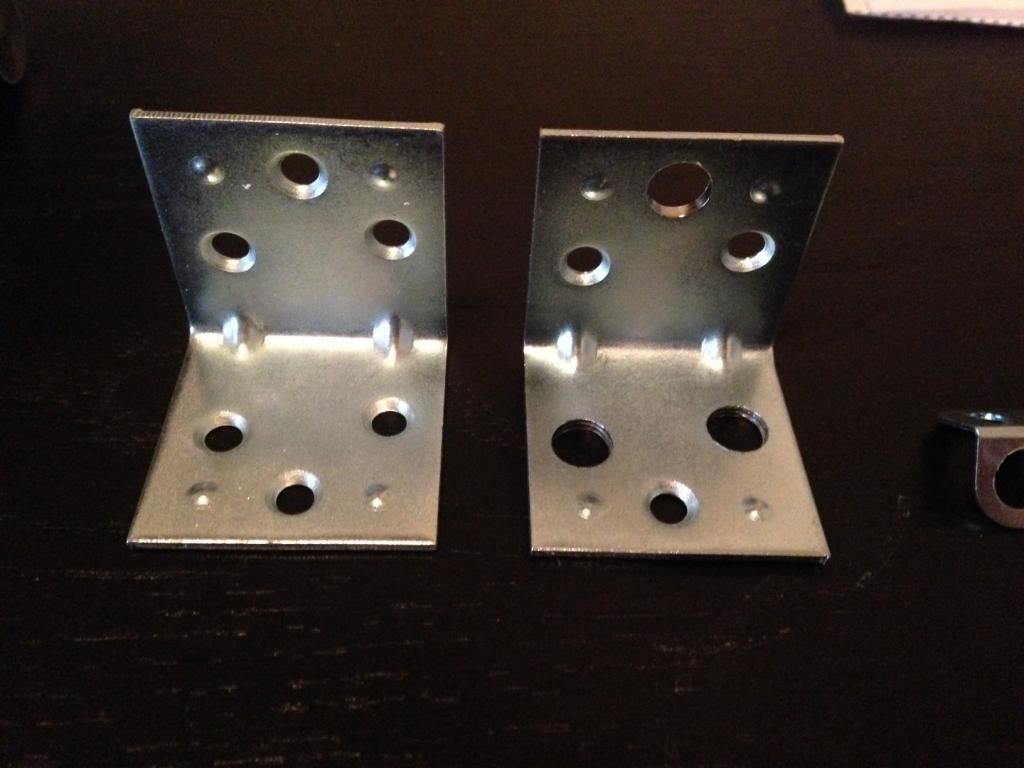
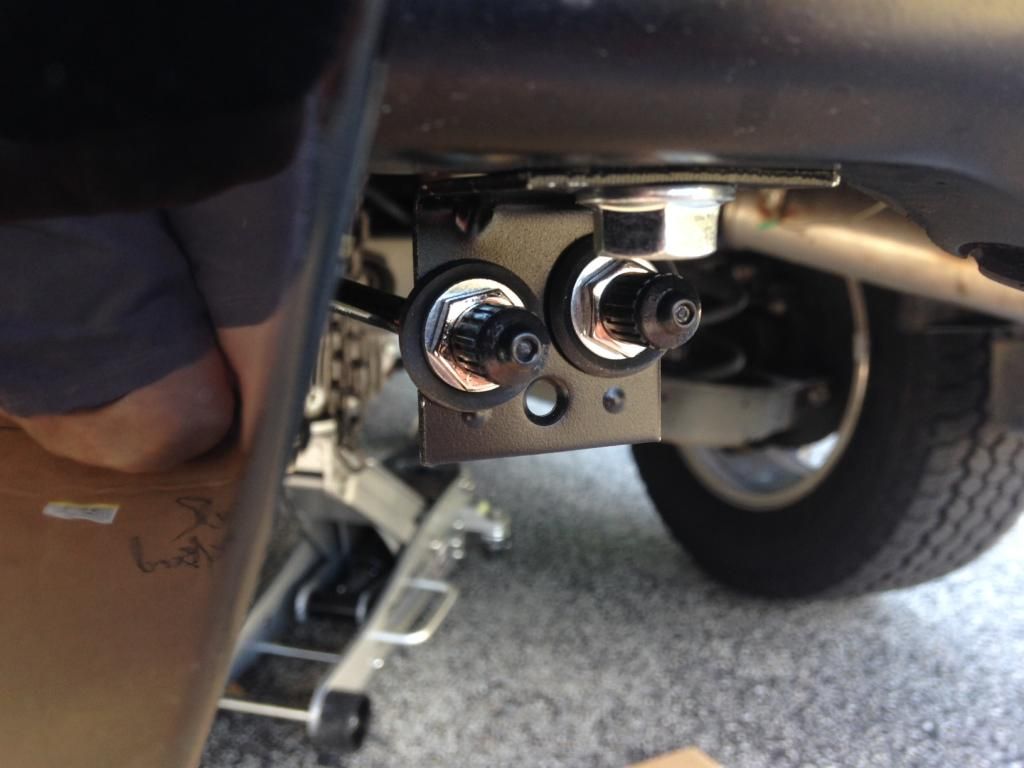
To start, I opted to separate each airbag and run them on independent airlines. I wanted easy access to the valves and a clean factory look. I decided to modify a bracket to attach it to the trailer hitch at the already existing hole for a 7-pin conversion mount. Here's the Home Depot bought bracket I decided on after many failed candidates. I drilled out one of the holes on one side to attach to the hitch and two holes on the other part for the valve stem assemblies to run through. For comparison, the bracket on the right is the "after" and the left is the "before".
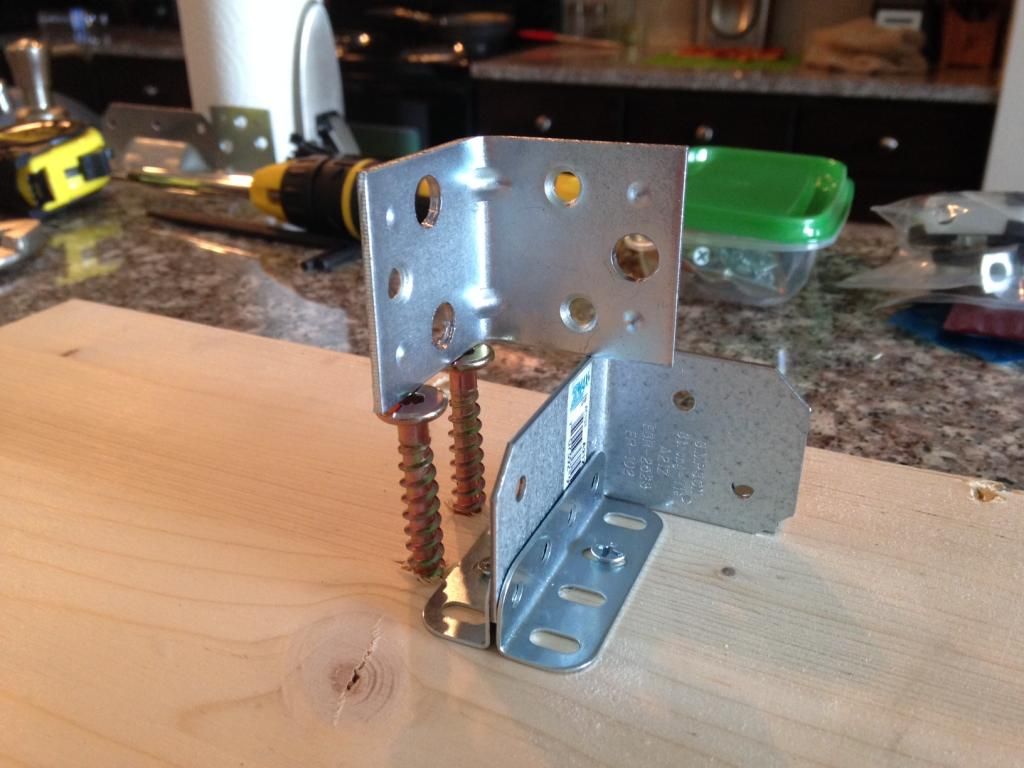
I made use of the other brackets that turned out to be duds and made a Frankenstein of a stand to sit the bracket on while I painted it in my state of the art painting booth...
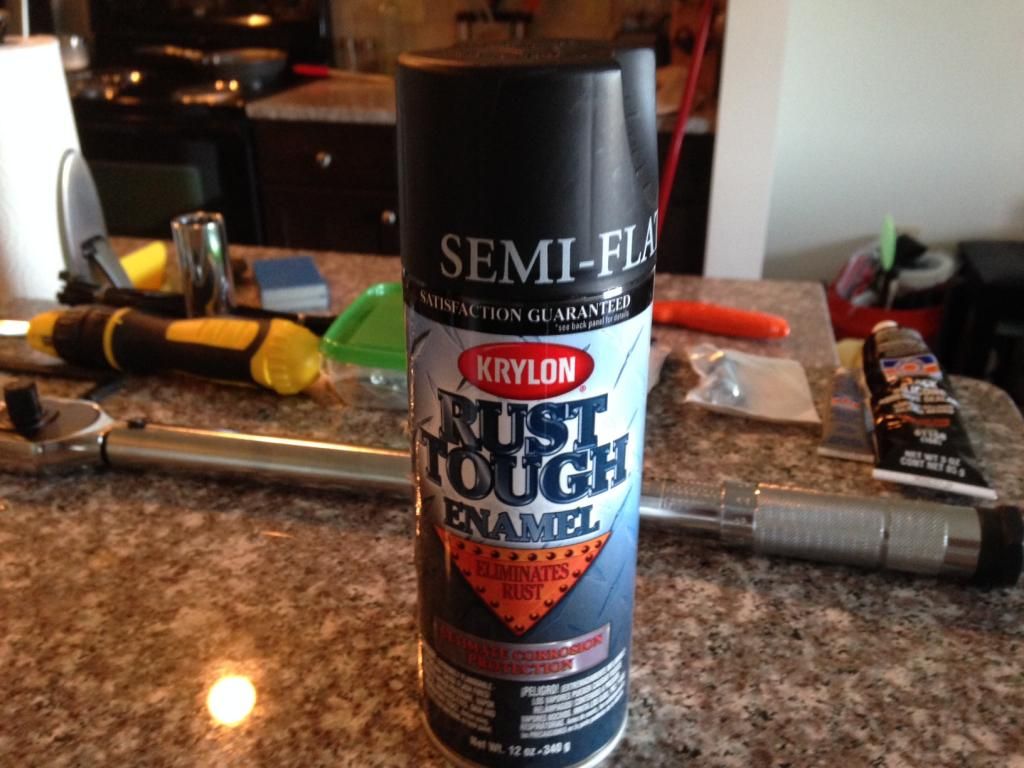
I roughed up the bracket with some steel wool and after reading some positive reviews used Krylon's semi-flat black Rust Tough paint. It went on really nicely and took about 4 light coats to get a nice finish.

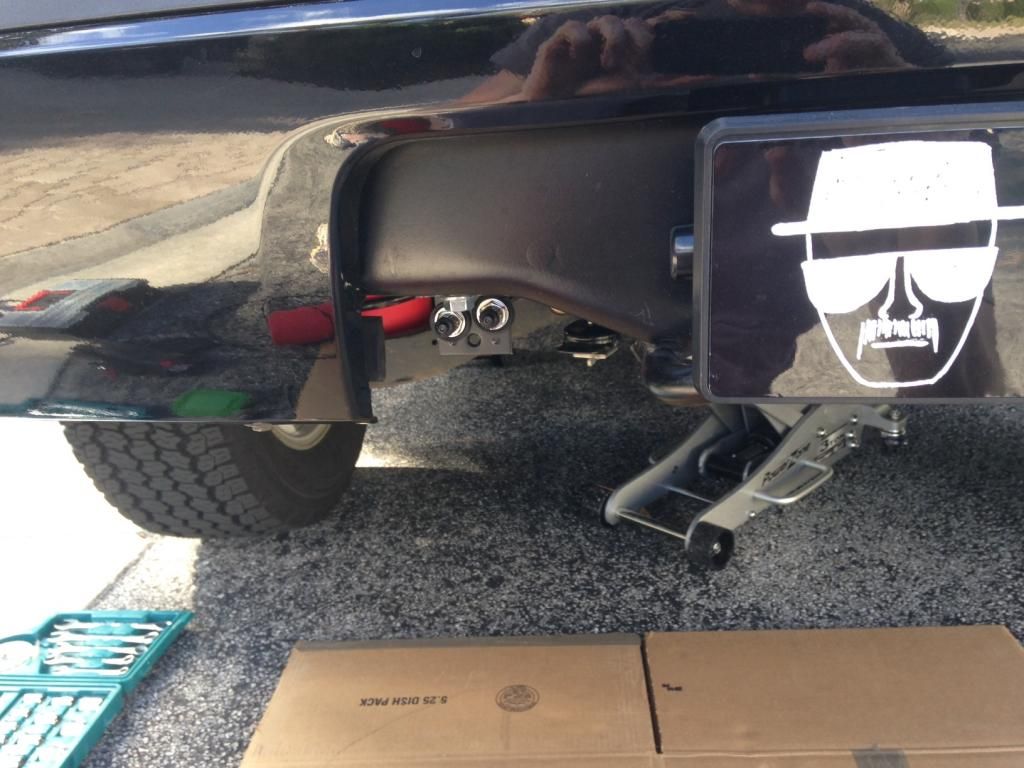
Here's the bracket installed with the air valves attached. The paint was a pretty spot on match with the hitch's color.
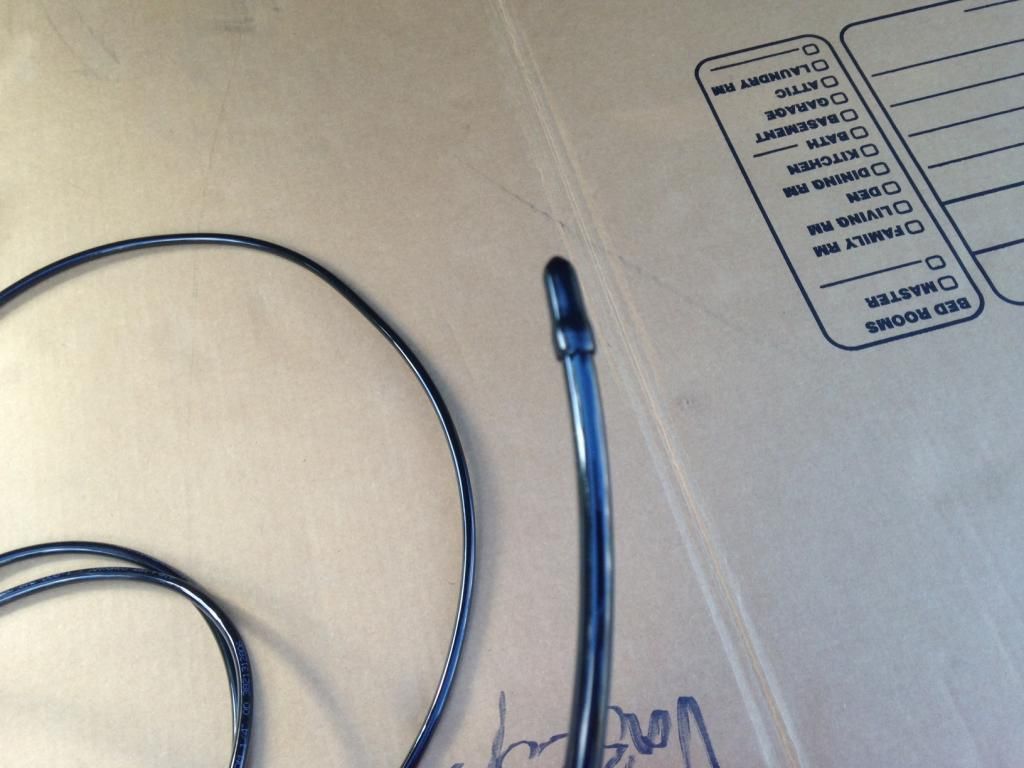
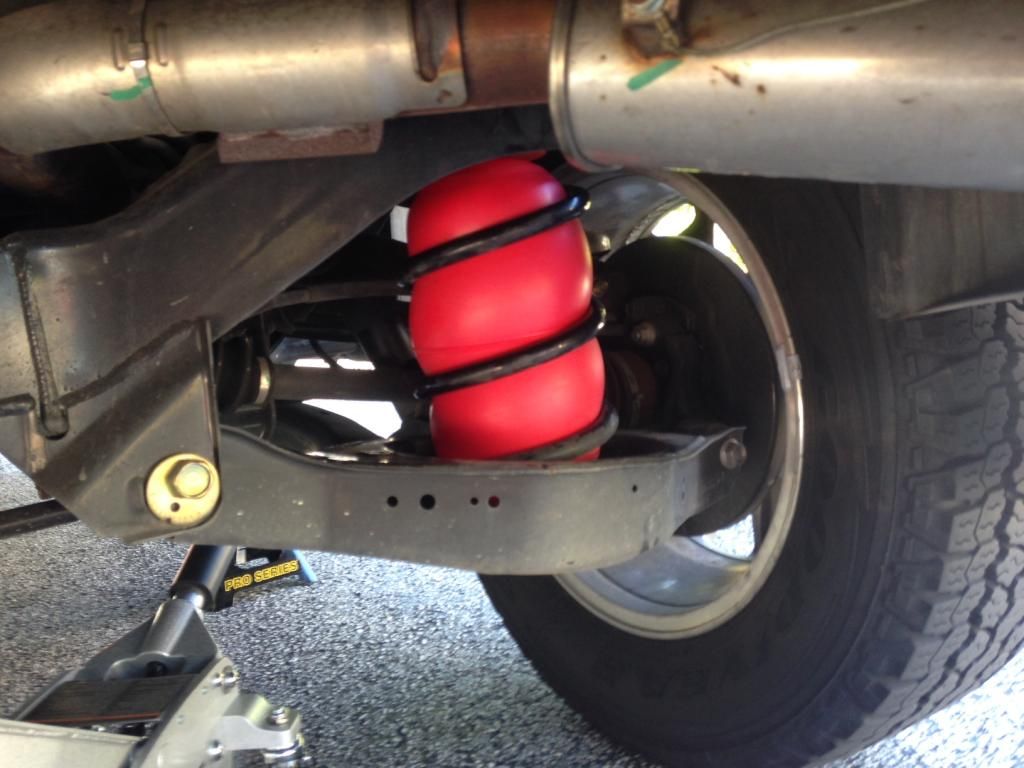
So, after reading a few install write-ups, I used the method of running the airline through the top of the coil and attaching it to the airbag BEFORE trying to get the airbag in the coil. After wrestling the bag into the coil I cannot imagine doing it after putting the airbag in.
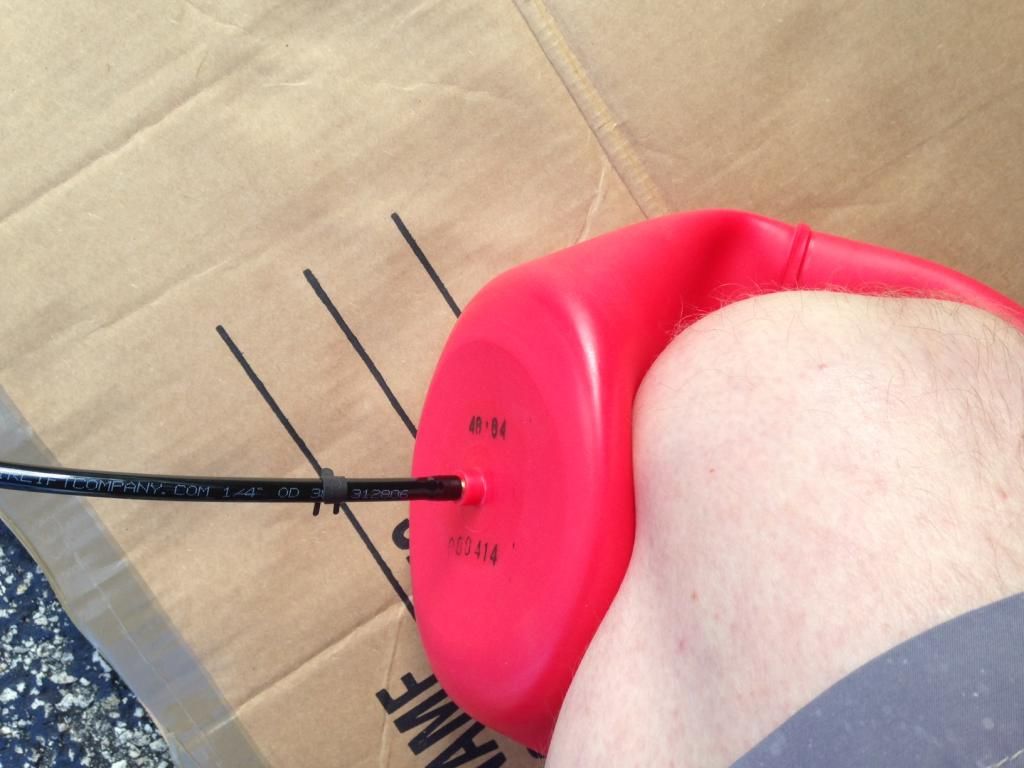
As many others have done, I ran the line through the coil (I recommend bringing the line through the coil's second-from-the-bottom gap as it's much wider than the bottom space and about midway up the height of the coil). I attached the line to the airbag, used my knee to push as much air out as possible and used the rubber cap that was on the airbag on the open end of the airline to seal the bag and keep it deflated.
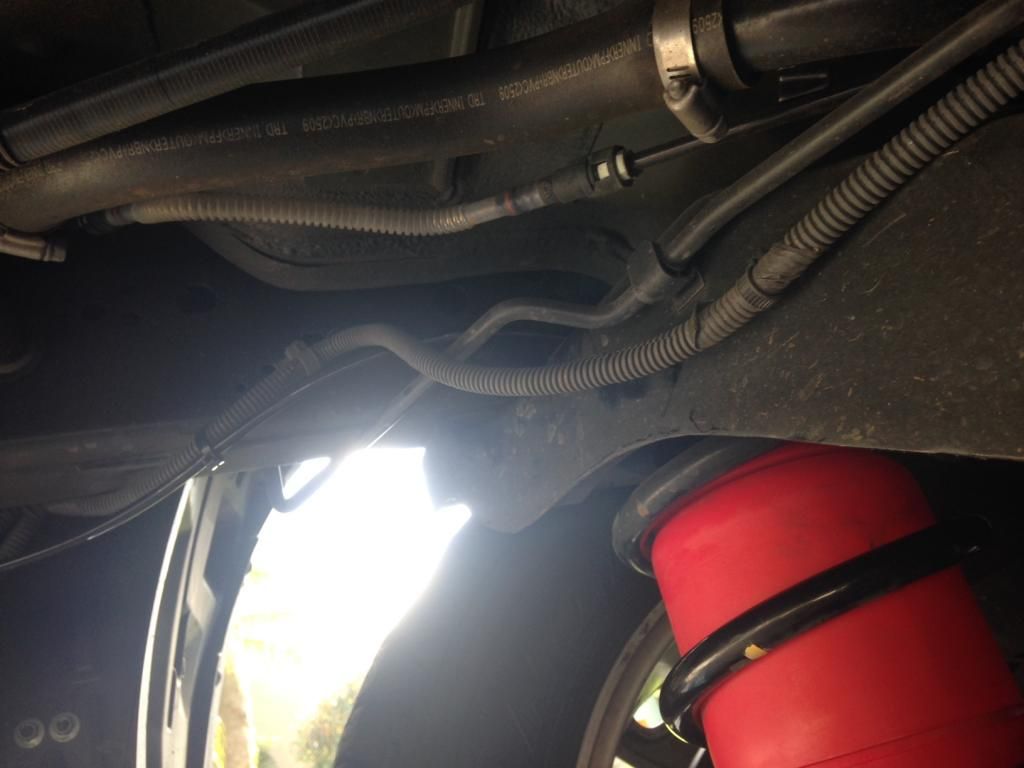
The driver side was a breeze to set up because you don't have the exhaust to worry about and plenty of spots to ziptie the airline. I ran the line along the wiring for the hitch's electrical.
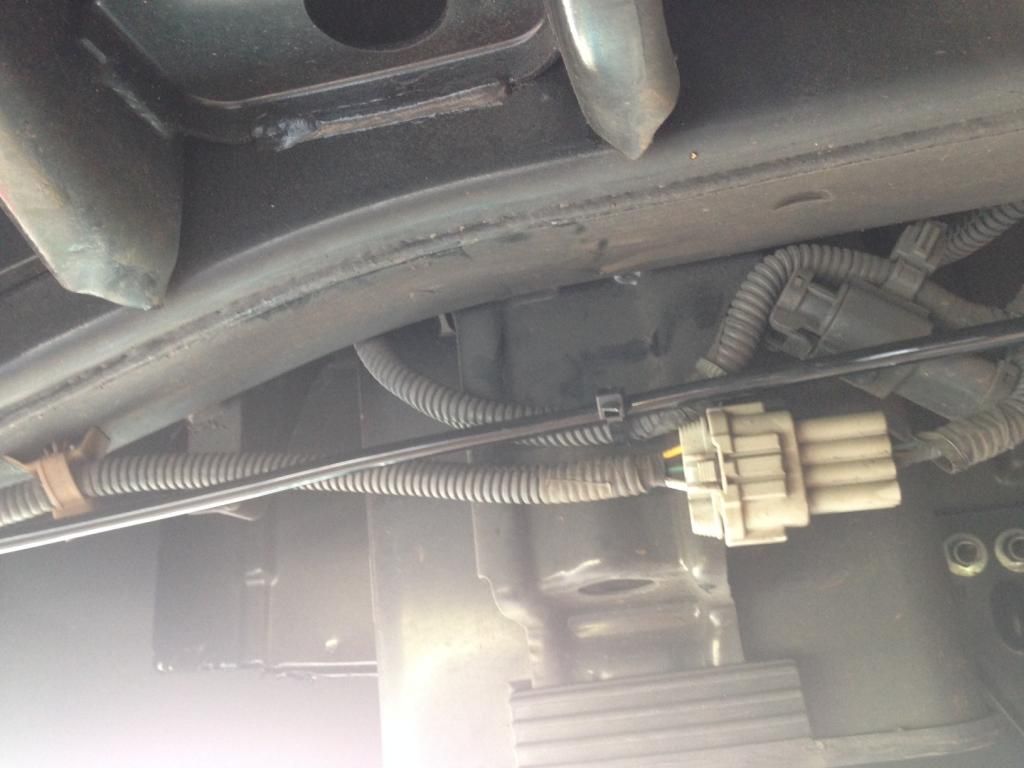
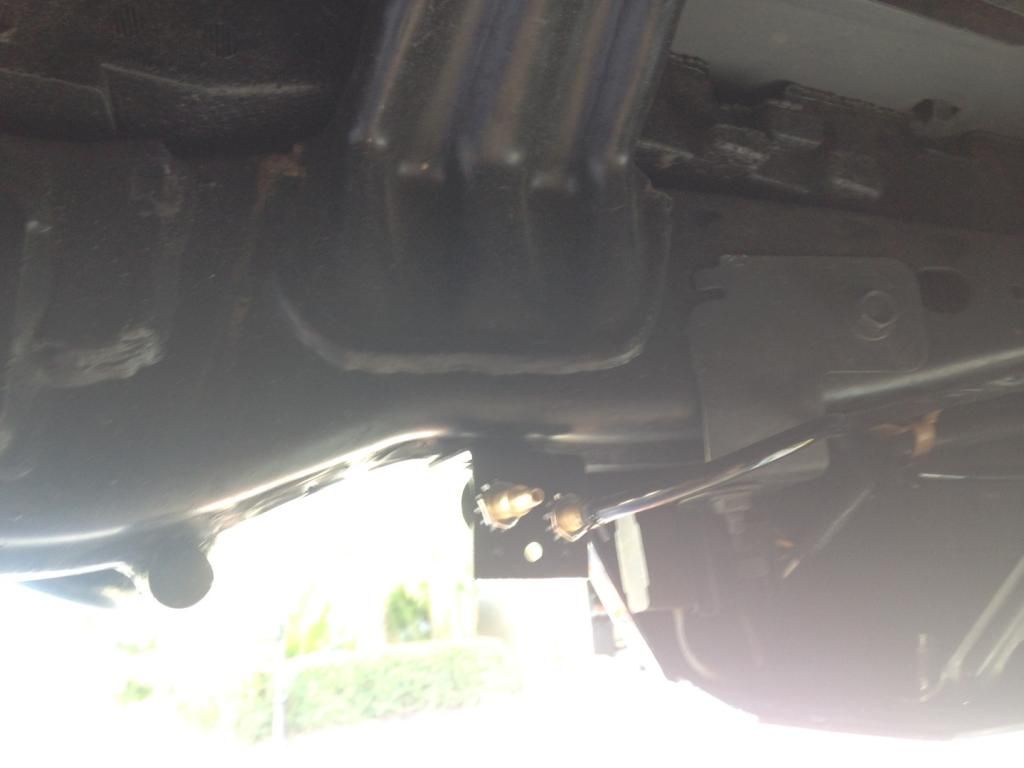
Sorry for the blurry photo, but here's the driver side line running into the back of the bracket with the valve stems:
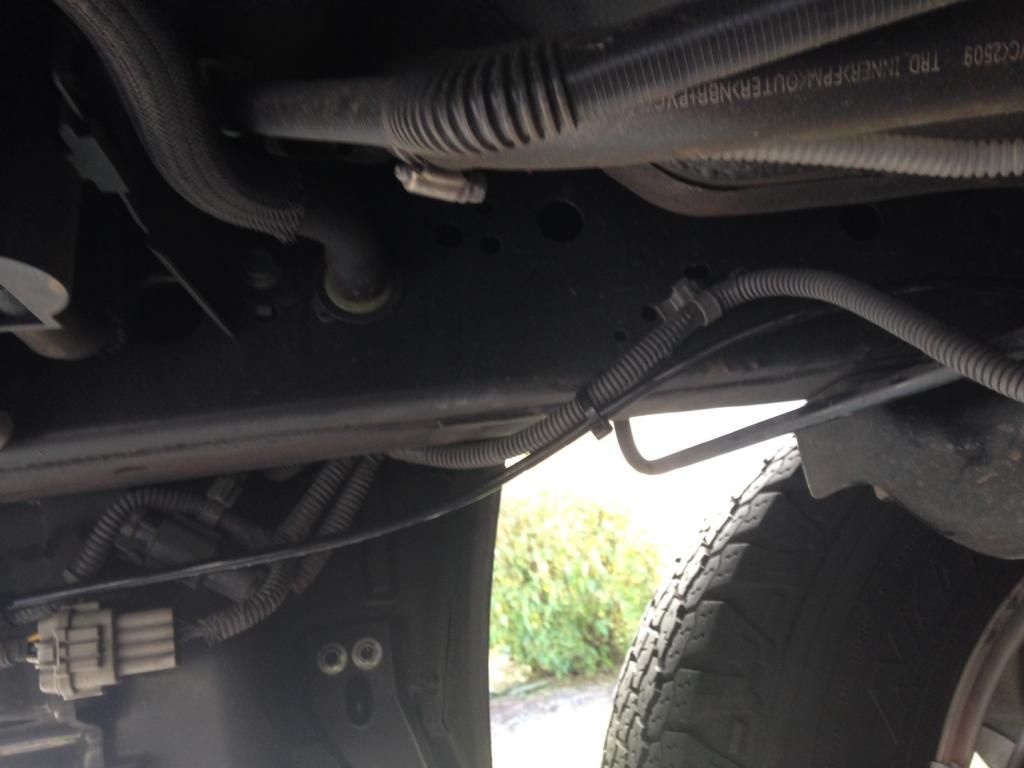
The passenger side is where I strayed from the paths I've seen most commonly taken as far as running airline. Because of where I put the valve stems, I had to figure out a way to run the line along the inside of the body using zipties and staying as far away from the exhaust as possible (the instructions recommend a 7" gap if you don't put in some kind of heat shield). The line comes out of the top of the coil right by the muffler and on the inner side of the frame rail.
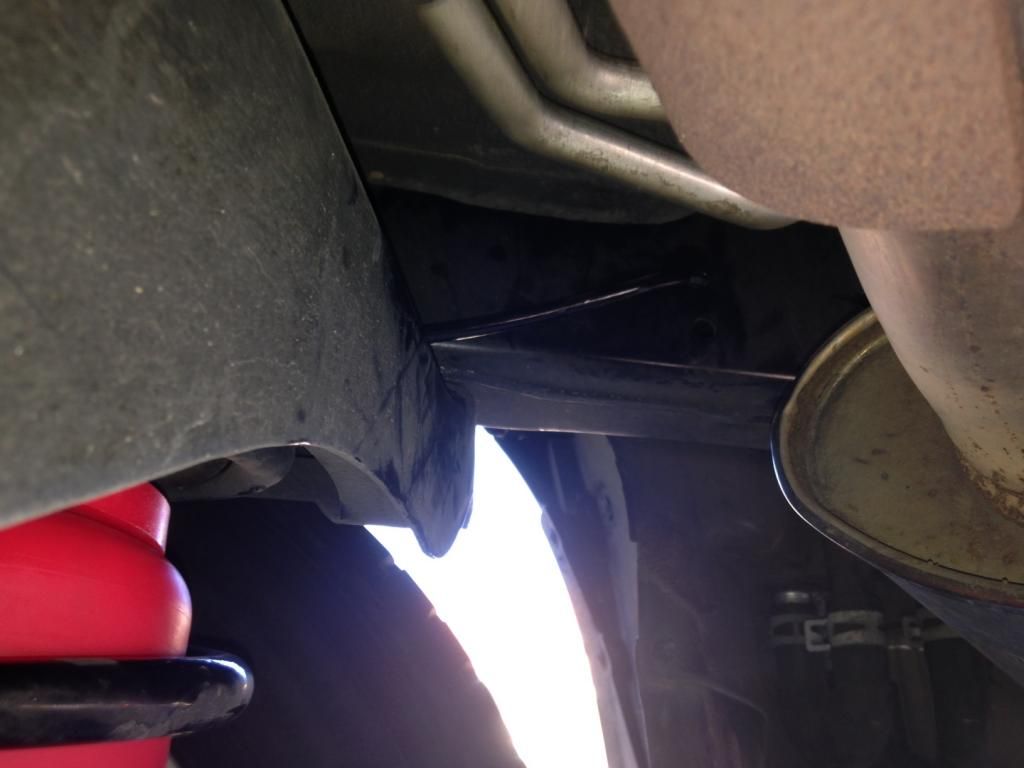
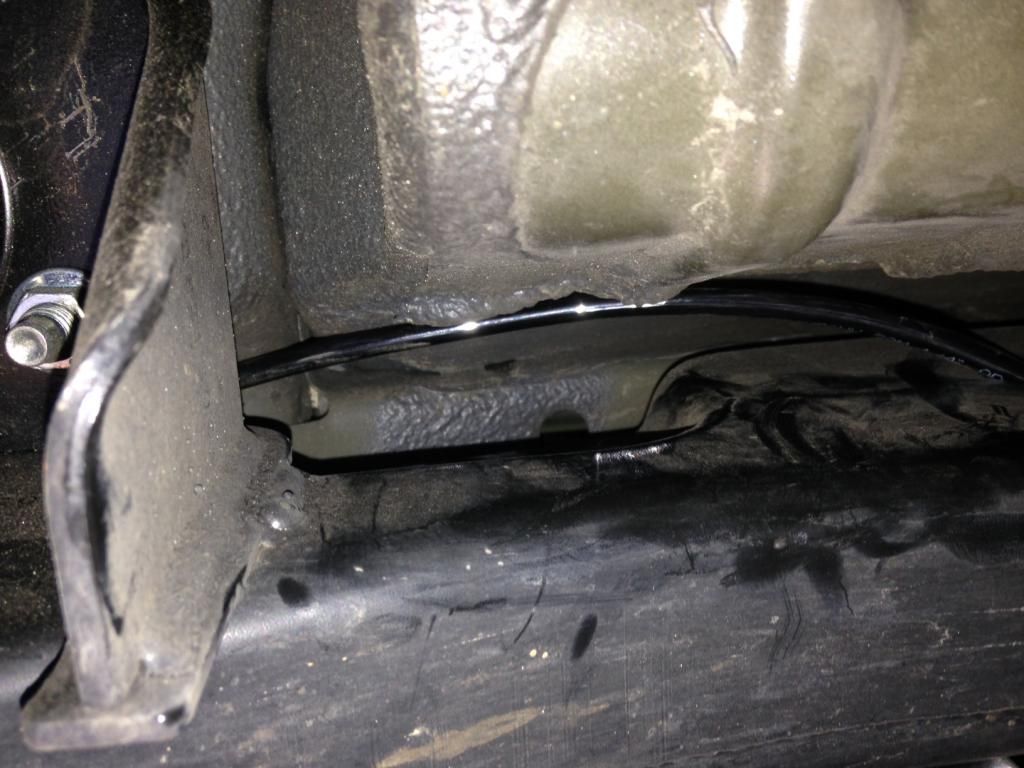
Because there was no way the zipties I had were long enough to get around the line if I ran it on the top of the frame rail, I took advantage of holes in the hollow rail and fished the line past the exhaust inside of the rail itself. There are two holes in the rail about 6" behind where the coil sits where I put the line in. It's a little tough to make out in the photos but here's the line coming from the bag and then into the frame:
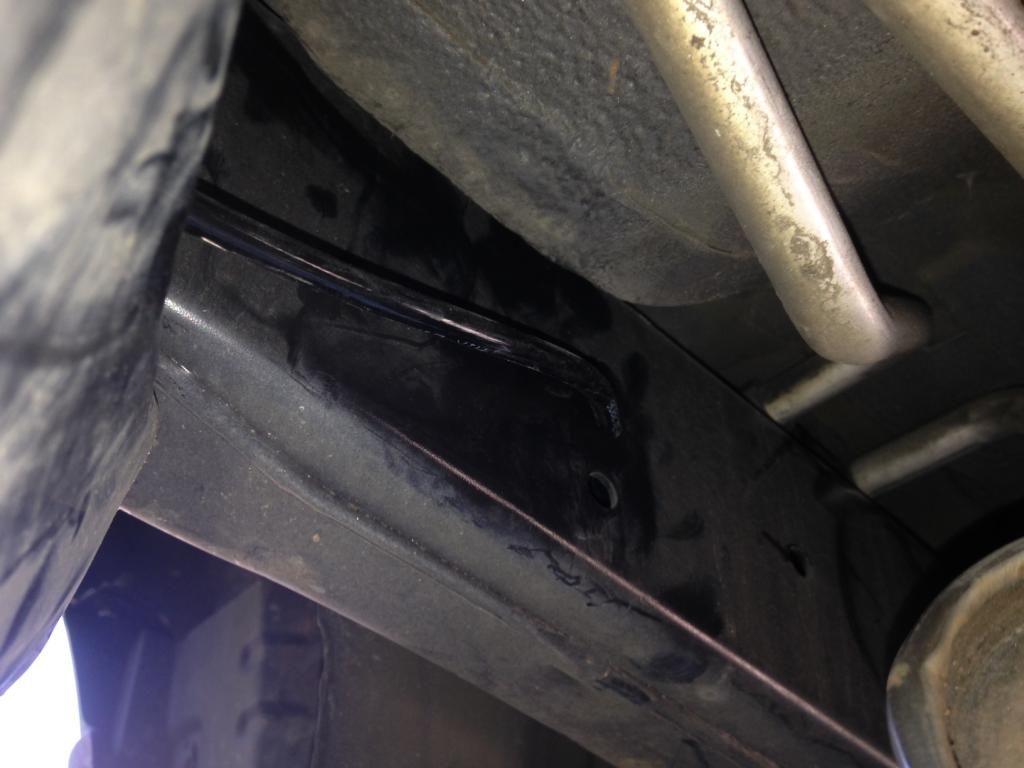
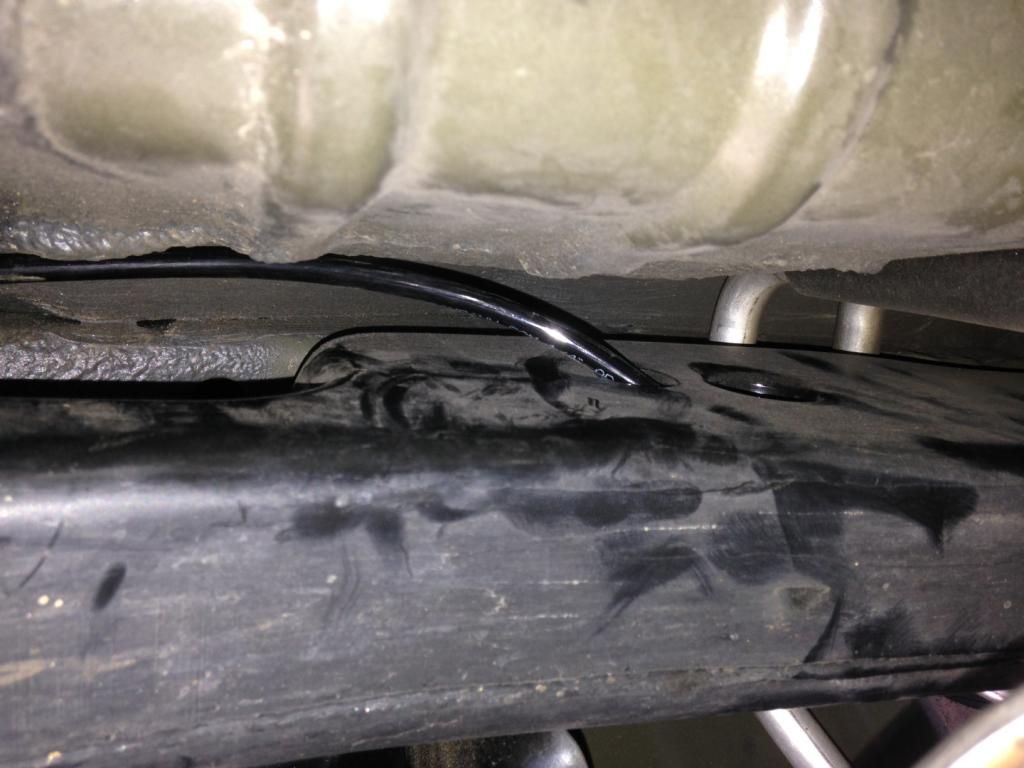
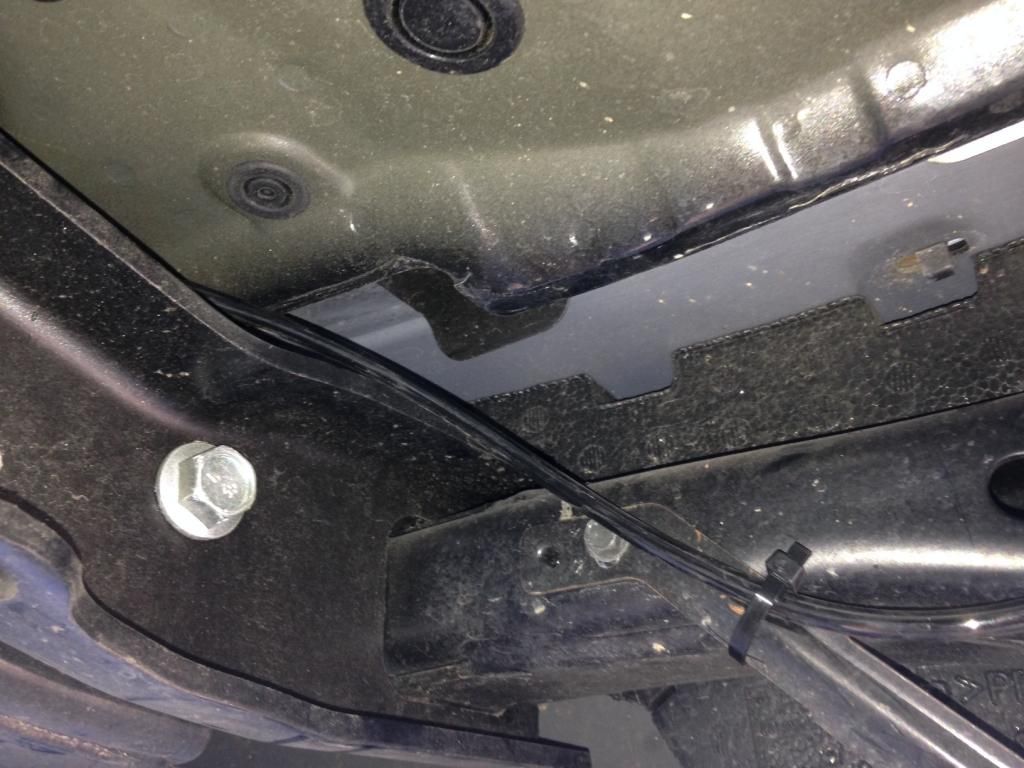
A few inches behind where the rail clears the exhaust, there are more holes. I pulled the line through on the outer side of the rail in between the body panel and the frame. Here is the line coming out and then running along the side of the rail and over a crossmember towards the rear bumper.
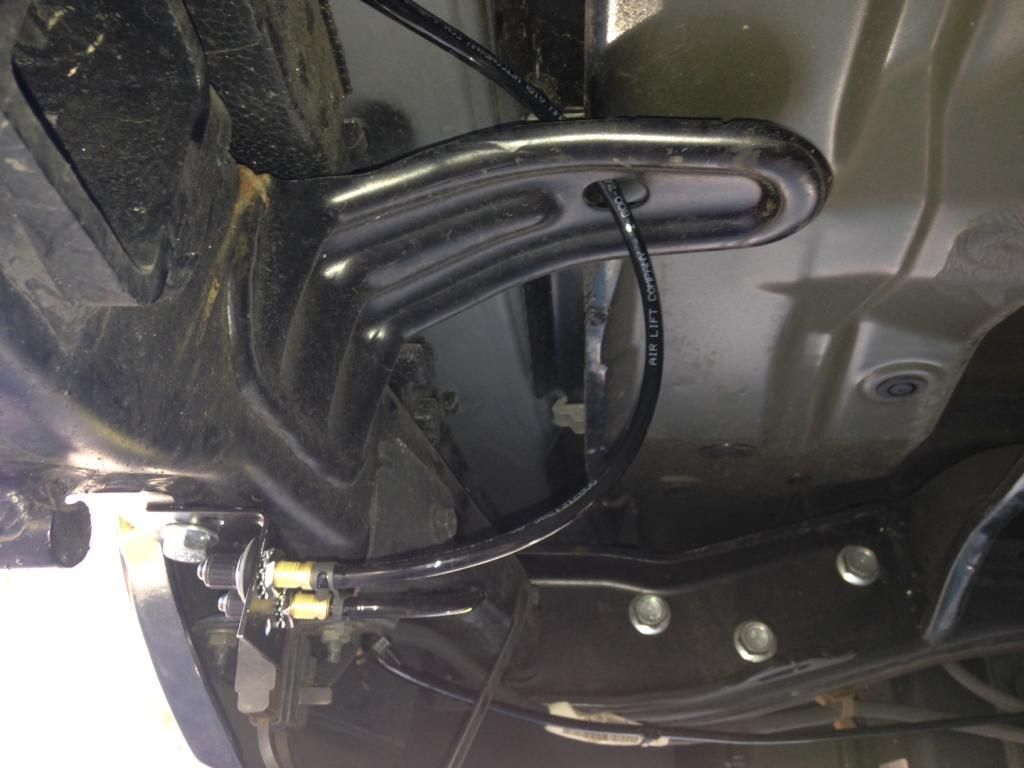
I secured the line to a part of the rear hitch on the passenger side:
The only way I could find to run the line along the inside of the rear bumper keeping it above the open area below the bumper cover and hidden from view was through a gap behind the styrofoam block attached to the rear bumper cover.

At the end I put the line through a hole on the little metal arm that the spare tire sits against when it's on. I was a little worried the tire might pinch the line, but luckily there's plenty of clearance.
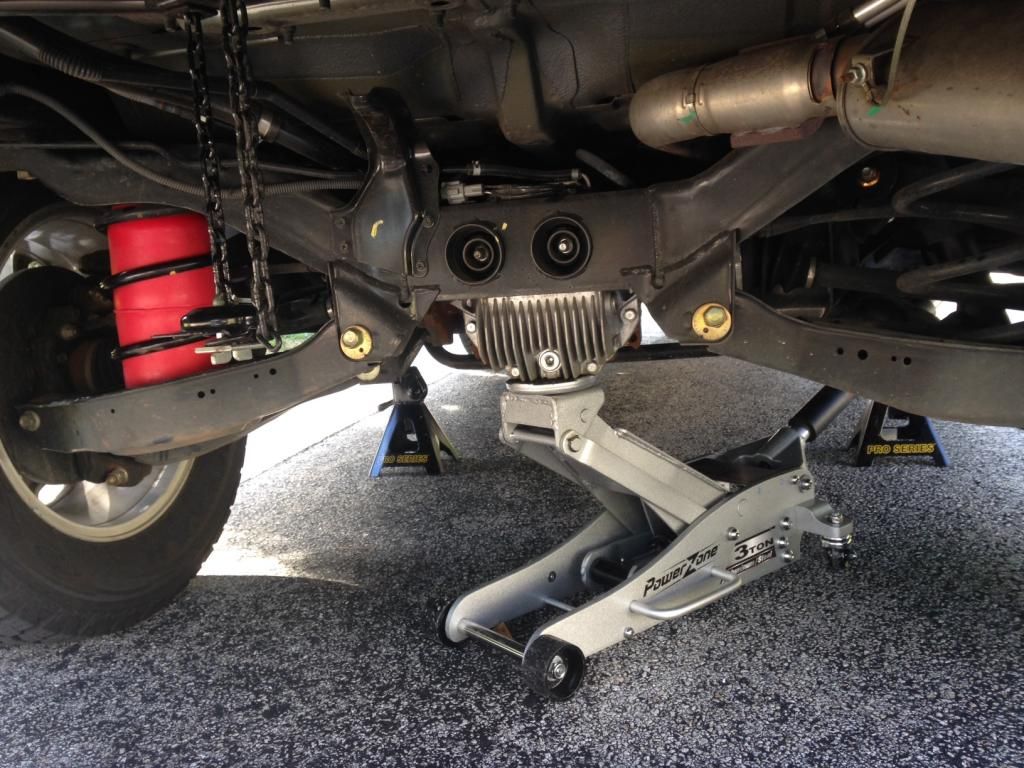
Here are the two bags installed before pressurizing them.
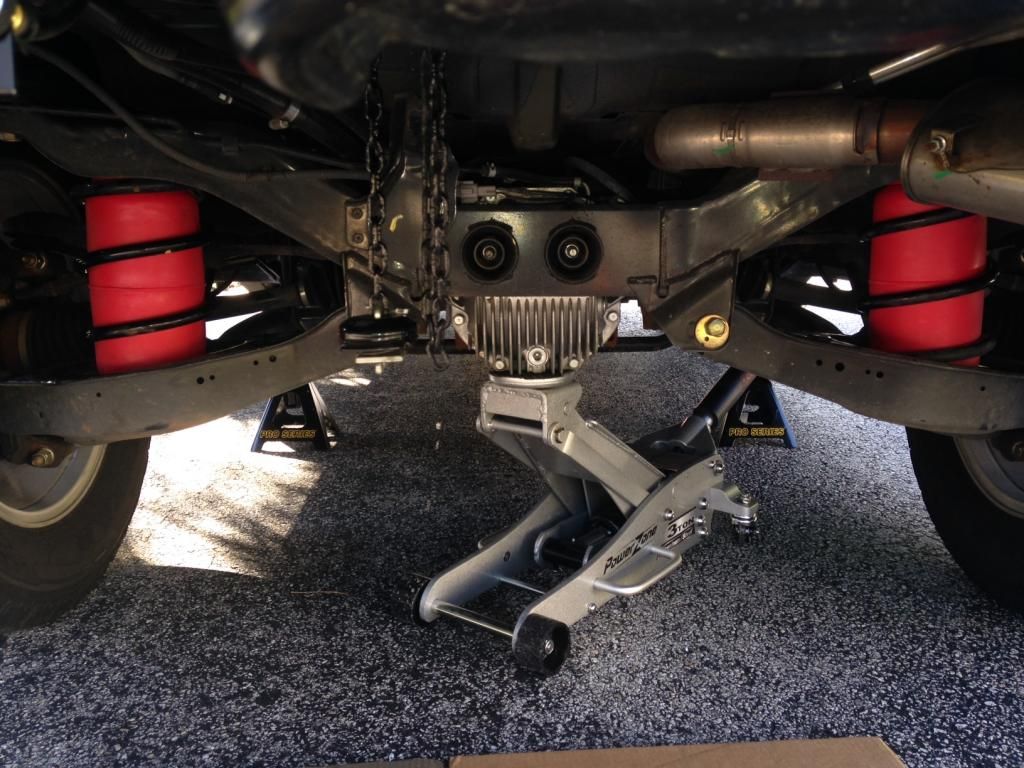
This is what my bags looked like after filling them to 35 psi to begin with and before I fully lowered the truck back onto the ground.
I've had the bags in for about 3 weeks now and have to say they make the rear end of the truck smarten right up. It feels like a whole new animal. After some testing, I found that I like them at about 13-14psi for normal daily driving. I haven't towed with them yet, but I can guarantee it'll be completely different experience than towing without.
Hope y'all enjoyed.
To start, I opted to separate each airbag and run them on independent airlines. I wanted easy access to the valves and a clean factory look. I decided to modify a bracket to attach it to the trailer hitch at the already existing hole for a 7-pin conversion mount. Here's the Home Depot bought bracket I decided on after many failed candidates. I drilled out one of the holes on one side to attach to the hitch and two holes on the other part for the valve stem assemblies to run through. For comparison, the bracket on the right is the "after" and the left is the "before".

I made use of the other brackets that turned out to be duds and made a Frankenstein of a stand to sit the bracket on while I painted it in my state of the art painting booth...


I roughed up the bracket with some steel wool and after reading some positive reviews used Krylon's semi-flat black Rust Tough paint. It went on really nicely and took about 4 light coats to get a nice finish.


Here's the bracket installed with the air valves attached. The paint was a pretty spot on match with the hitch's color.


So, after reading a few install write-ups, I used the method of running the airline through the top of the coil and attaching it to the airbag BEFORE trying to get the airbag in the coil. After wrestling the bag into the coil I cannot imagine doing it after putting the airbag in.
As many others have done, I ran the line through the coil (I recommend bringing the line through the coil's second-from-the-bottom gap as it's much wider than the bottom space and about midway up the height of the coil). I attached the line to the airbag, used my knee to push as much air out as possible and used the rubber cap that was on the airbag on the open end of the airline to seal the bag and keep it deflated.


The driver side was a breeze to set up because you don't have the exhaust to worry about and plenty of spots to ziptie the airline. I ran the line along the wiring for the hitch's electrical.


Sorry for the blurry photo, but here's the driver side line running into the back of the bracket with the valve stems:

The passenger side is where I strayed from the paths I've seen most commonly taken as far as running airline. Because of where I put the valve stems, I had to figure out a way to run the line along the inside of the body using zipties and staying as far away from the exhaust as possible (the instructions recommend a 7" gap if you don't put in some kind of heat shield). The line comes out of the top of the coil right by the muffler and on the inner side of the frame rail.

Because there was no way the zipties I had were long enough to get around the line if I ran it on the top of the frame rail, I took advantage of holes in the hollow rail and fished the line past the exhaust inside of the rail itself. There are two holes in the rail about 6" behind where the coil sits where I put the line in. It's a little tough to make out in the photos but here's the line coming from the bag and then into the frame:

A few inches behind where the rail clears the exhaust, there are more holes. I pulled the line through on the outer side of the rail in between the body panel and the frame. Here is the line coming out and then running along the side of the rail and over a crossmember towards the rear bumper.


I secured the line to a part of the rear hitch on the passenger side:

The only way I could find to run the line along the inside of the rear bumper keeping it above the open area below the bumper cover and hidden from view was through a gap behind the styrofoam block attached to the rear bumper cover.

At the end I put the line through a hole on the little metal arm that the spare tire sits against when it's on. I was a little worried the tire might pinch the line, but luckily there's plenty of clearance.

Here are the two bags installed before pressurizing them.

This is what my bags looked like after filling them to 35 psi to begin with and before I fully lowered the truck back onto the ground.

I've had the bags in for about 3 weeks now and have to say they make the rear end of the truck smarten right up. It feels like a whole new animal. After some testing, I found that I like them at about 13-14psi for normal daily driving. I haven't towed with them yet, but I can guarantee it'll be completely different experience than towing without.
Hope y'all enjoyed.