ClockSpring Adventure
Posted: Wed Aug 04, 2021 2:49 pm
Hey All,
I know it's been documented elsewhere but, I wanted to add this here. If it's not the right place, Mods, please delete this topic.
I just wanted to say that I struggled for a good 30 min and almost gave up because I couldn't figure out how to get the Airbag off. I did not realize you had to push up on the bar visible through the hole on the bottom. I was trying to push it one way or the other. Once I figured that out the rest was pretty simple.
Again watching this https://www.youtube.com/watch?v=5O4GJRjpsCs helped a tonne! Watch it beginning to end and then book mark it when you go to do yours.
The only part that, the video does not address is the SAS(Steering angle Sensor) on the back of your clock spring. I was very happy to realize that I could just simply unscrew the one from my old clock spring and put it on the new one, lining it up with the little tabs inside. Put it all back together and no codes. Phew. Didn't even need to calibrate for the Airbag.
Here are some pics I took along the way.
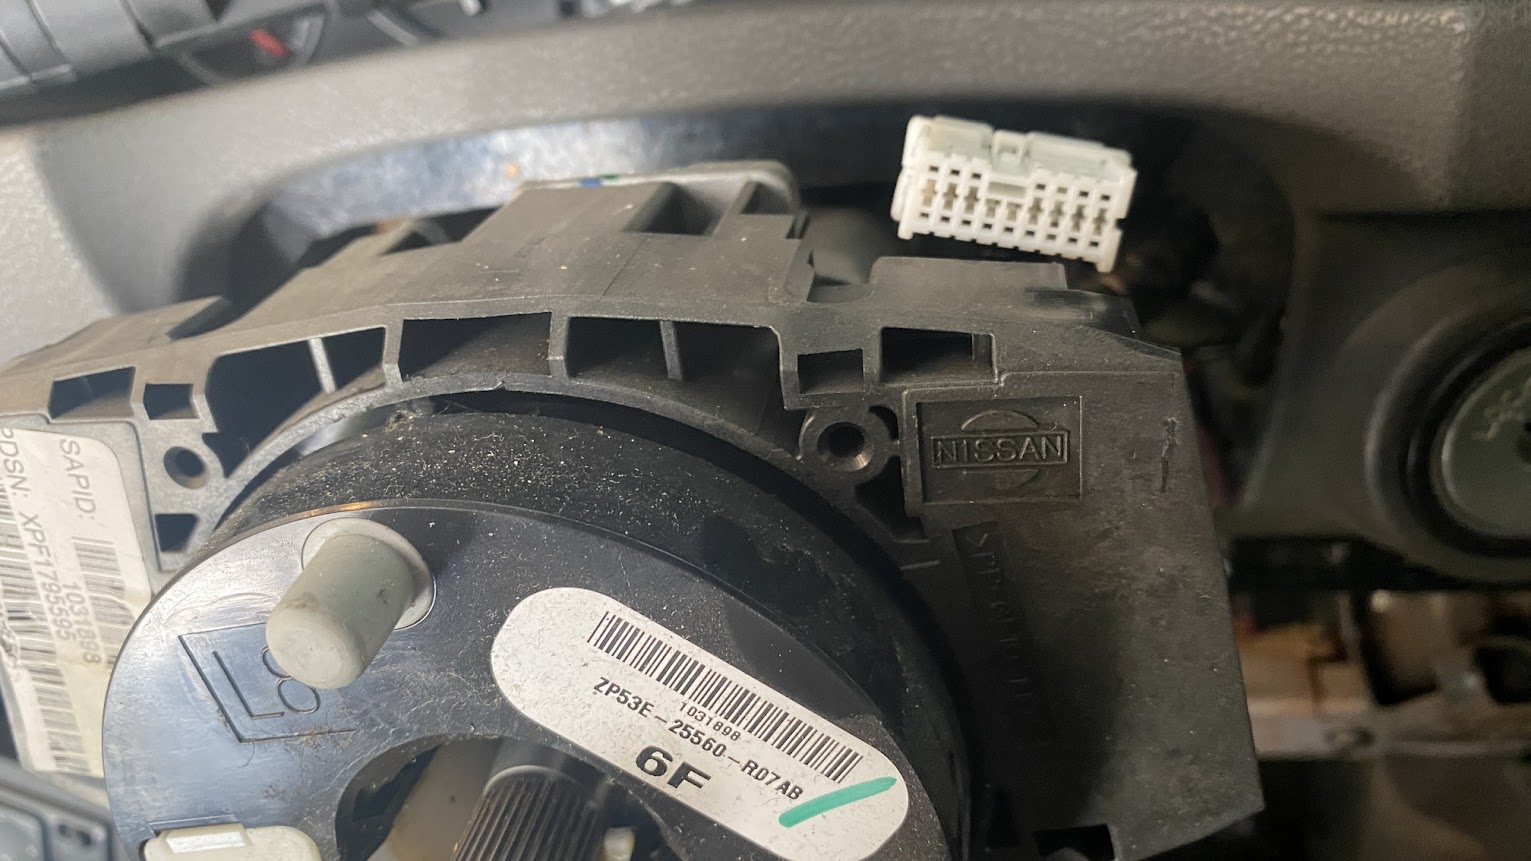
Steering Wheel Removed Clock Spring exposed.

I recommend disconnecting those Connectors before you remove the Clockspring from the steering wheel. It's MUCH easier!!
Lower Connectors

Upper Connector
Signal and wiper stocks unclipped from the ClockSpring

Old Vs New
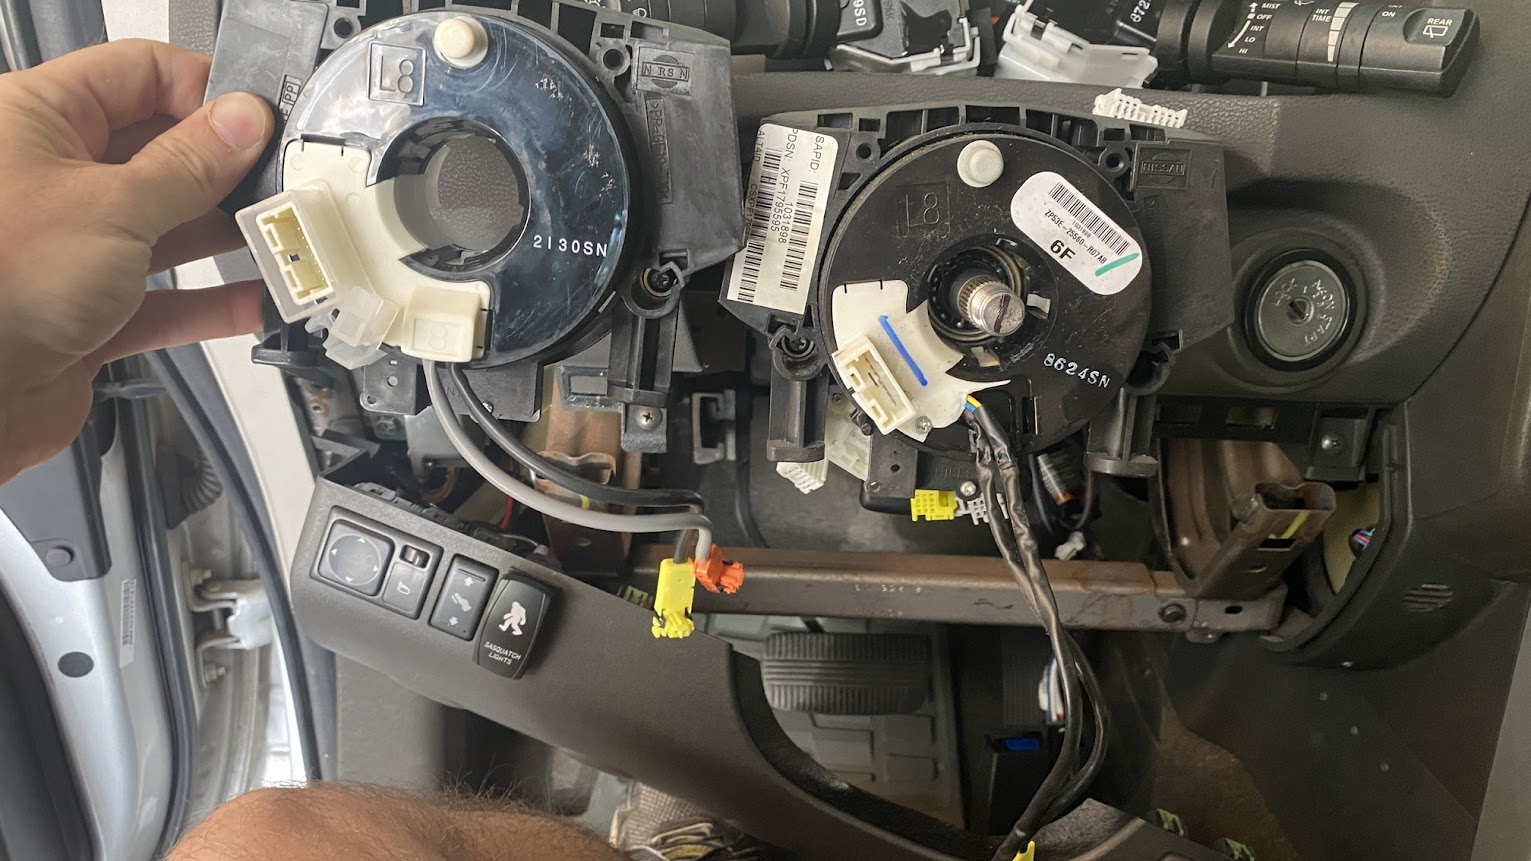
Steering Angle Sensor

Steering Angle Sensor Tabs in the Clockspring.

Anyways, I hope this helps others down the road.
I know it's been documented elsewhere but, I wanted to add this here. If it's not the right place, Mods, please delete this topic.
I just wanted to say that I struggled for a good 30 min and almost gave up because I couldn't figure out how to get the Airbag off. I did not realize you had to push up on the bar visible through the hole on the bottom. I was trying to push it one way or the other. Once I figured that out the rest was pretty simple.
Again watching this https://www.youtube.com/watch?v=5O4GJRjpsCs helped a tonne! Watch it beginning to end and then book mark it when you go to do yours.
The only part that, the video does not address is the SAS(Steering angle Sensor) on the back of your clock spring. I was very happy to realize that I could just simply unscrew the one from my old clock spring and put it on the new one, lining it up with the little tabs inside. Put it all back together and no codes. Phew. Didn't even need to calibrate for the Airbag.
Here are some pics I took along the way.
Steering Wheel Removed Clock Spring exposed.
I recommend disconnecting those Connectors before you remove the Clockspring from the steering wheel. It's MUCH easier!!
Lower Connectors
Upper Connector
Signal and wiper stocks unclipped from the ClockSpring
Old Vs New
Steering Angle Sensor
Steering Angle Sensor Tabs in the Clockspring.
Anyways, I hope this helps others down the road.