Custom DIY Roof Rack
Posted: Mon May 20, 2019 6:12 pm
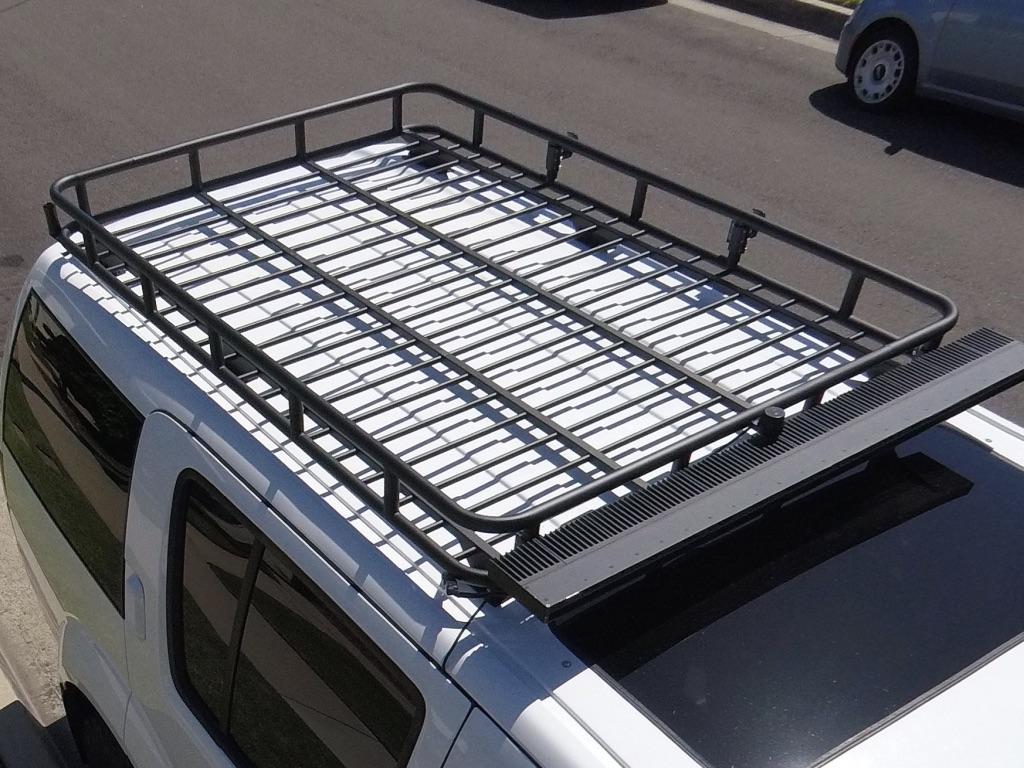
As we know, nobody in the States makes a direct-fit roof rack for the Pathy - the 4Runner racks are a little too wide and a little too short for the roof - so I decided to make my own. That required me to come up with a design, and learn how to weld.
Then, just to make it extra hard, I decided to use oxy-acetylene (even though have access to MIG and TIG welders) and teach myself the lost art of torch welding. I ended up doing a mix of welding and brazing, just for the learning experience.
Taking my favorite design cues from Baja and Gobi, I made a full-size mock-up to see how it fit the lines of the car. By the time I finished this last month, 5" deep baskets have gone out of vogue in favor of 3" and flat deck platforms, but I camp several times a year and the big basket is so useful I can't give it up.
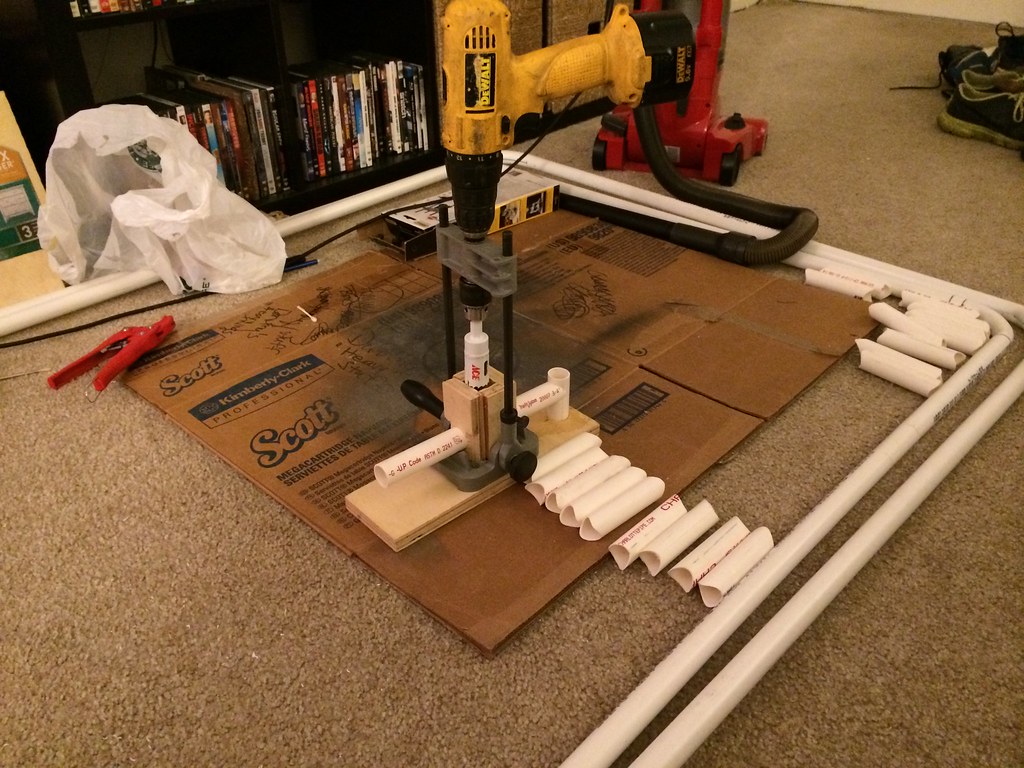
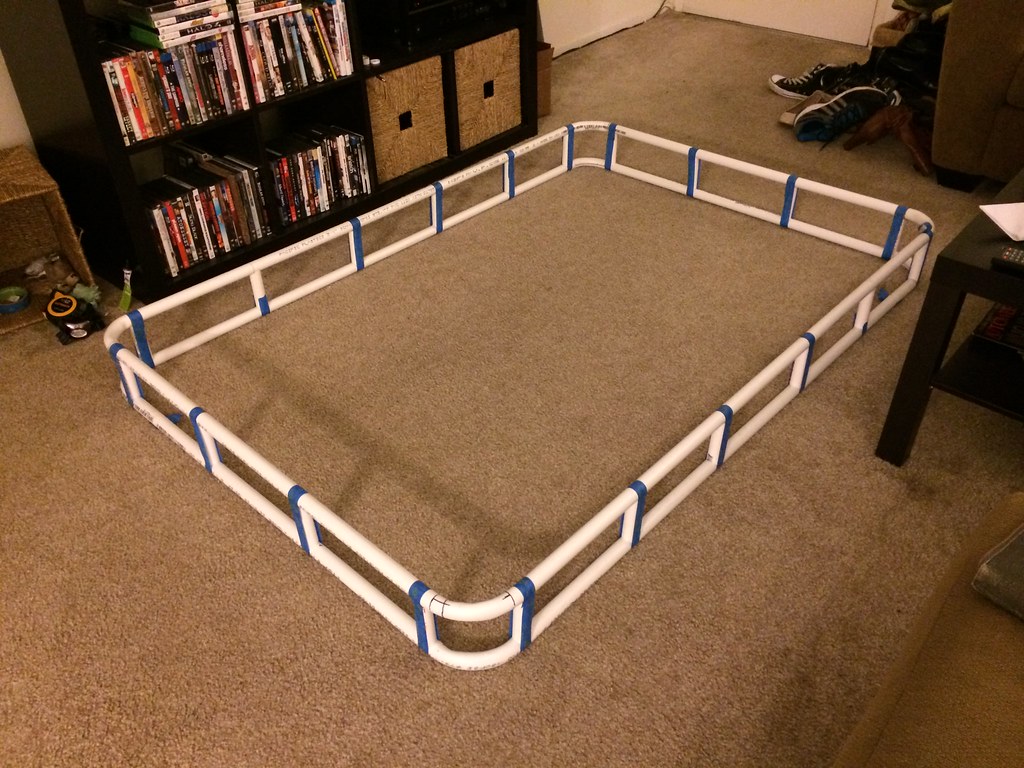
Making a mockup out of PVC in the living room, in 2014. The little holesaw guillotine worked great.
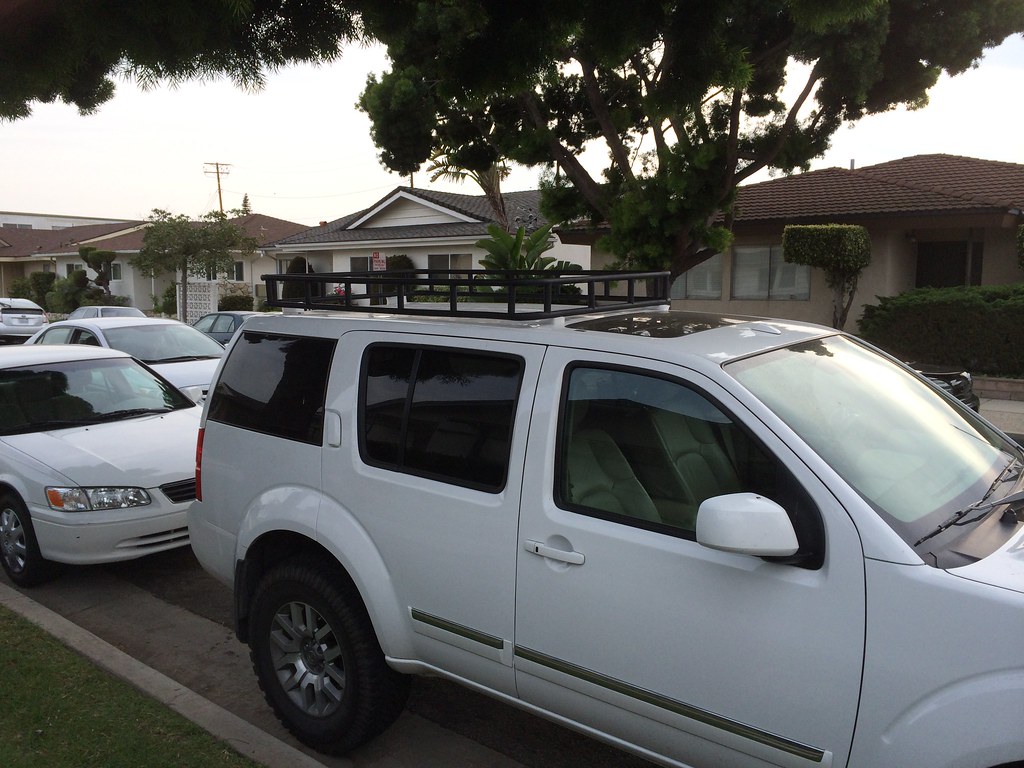
After painting, the mockup looked like the real thing. I really should manufacture these for the 99% who never actually put anything on their roof racks!

2016 - I decided to actually build it it, starting with a jig to hold the frame in place. It caught fire many times.
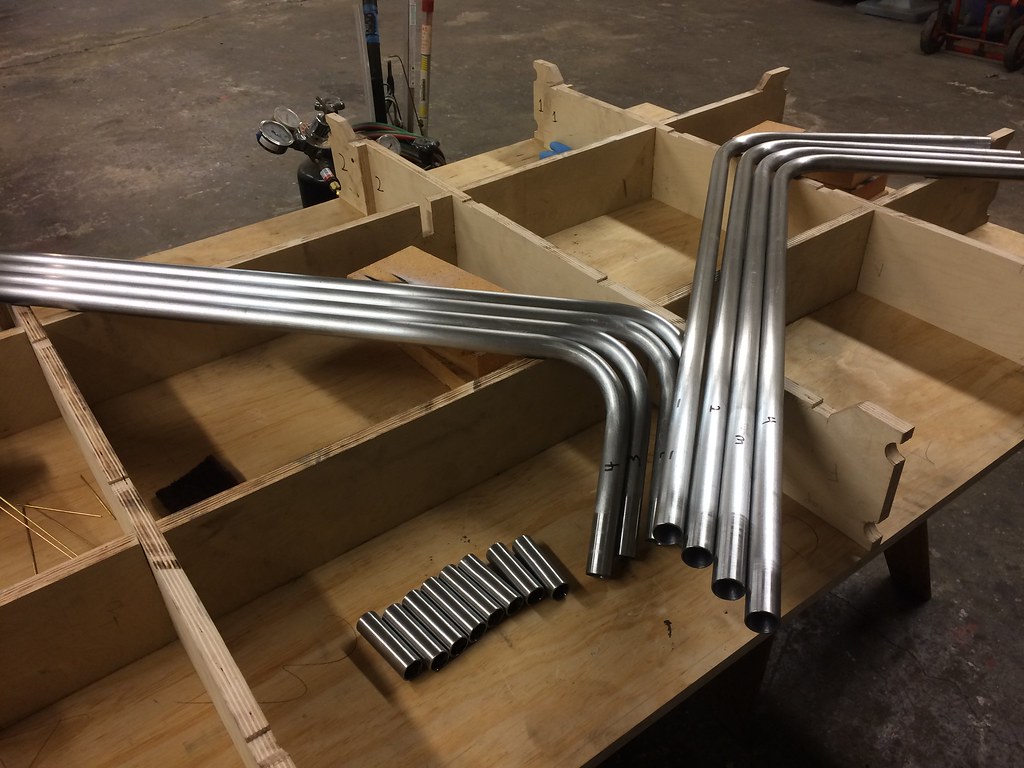
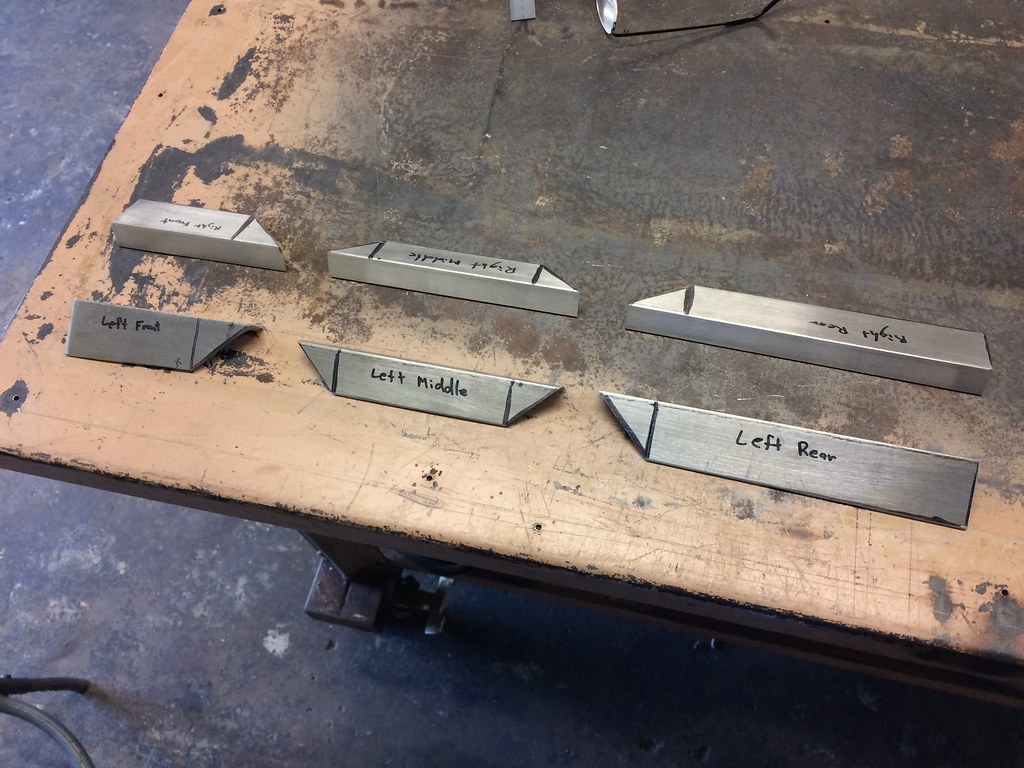
I had a shop do the bends. This was the only part I didn't do myself and I had to do quite a bit of tweaking to get them perfect. In hindsight I should have just bought a bender.

I bought a big floor-standing used drill press just for this project. Made a plywood jig to hold the tubing in place on the drill press, with a bit of tube on the end as a stop. It made perfectly consistent cuts.

The frame in the background was my first attempt and had to be scrapped because I tack-welded it in the jig, then took it out to finish weld - another big mistake - it twisted and was unfixable. So I had to start over with new metal, new bands, new posts...
Tack-welded.
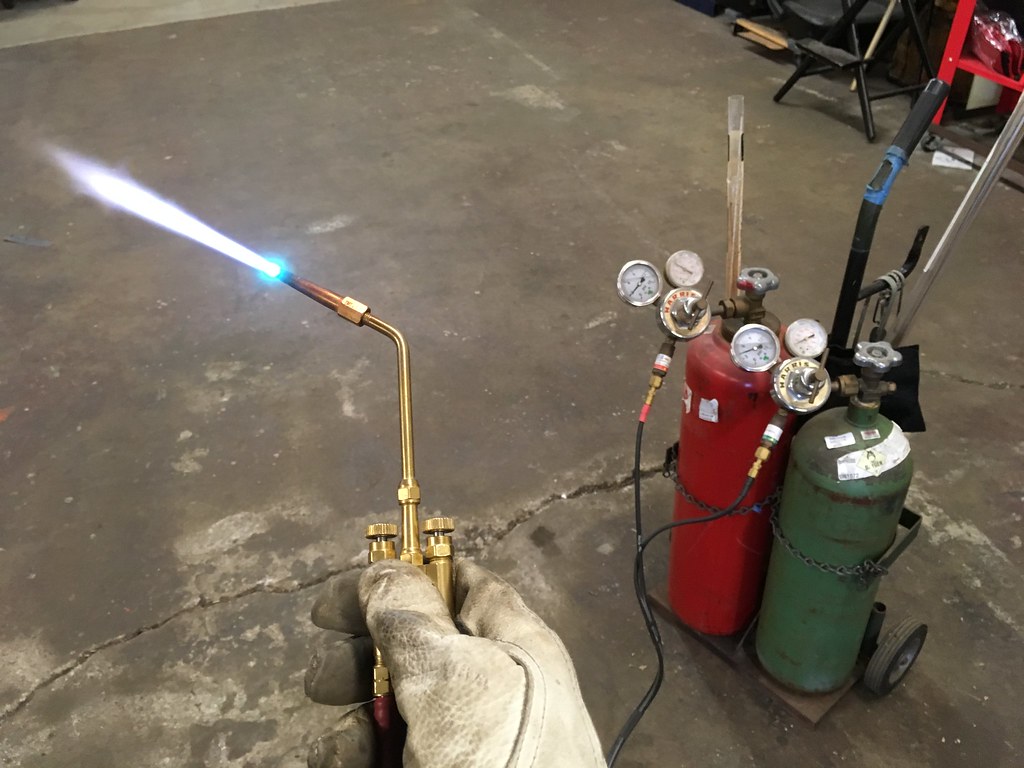
After much research I bought a Meco Midget torch. Far more precise and maneuverable than an ordinary torch.
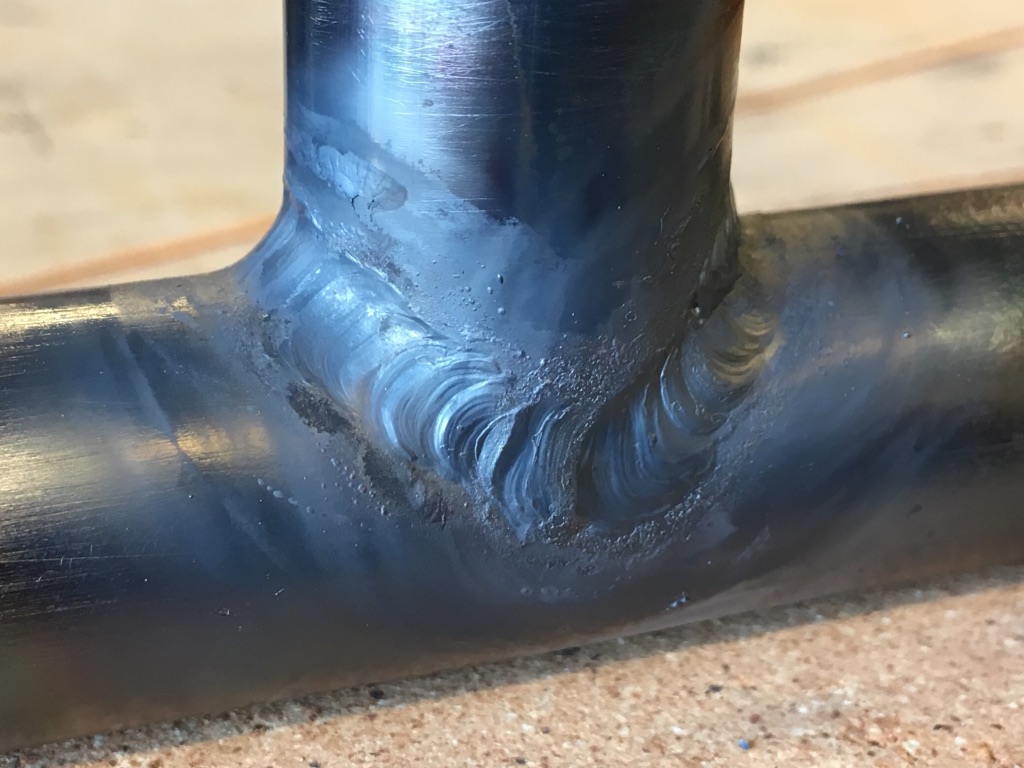
The gas weld bead has a very different look from a MIG bead. I welded about 90 of these joints - two frames @ 36 joints each, plus practice. I found it was best to weld half of the circle, let it cool, then weld the other half. This was complex - starting out with a lap joint which heats up really fast, transitioning into a corner joint which heats up really slow, then back into a lap joint, while rotating 180 degrees. I had to learn to change the torch angle to control the heat based on the joint as well as how many seconds had passed as the metal becomes pre-heated.

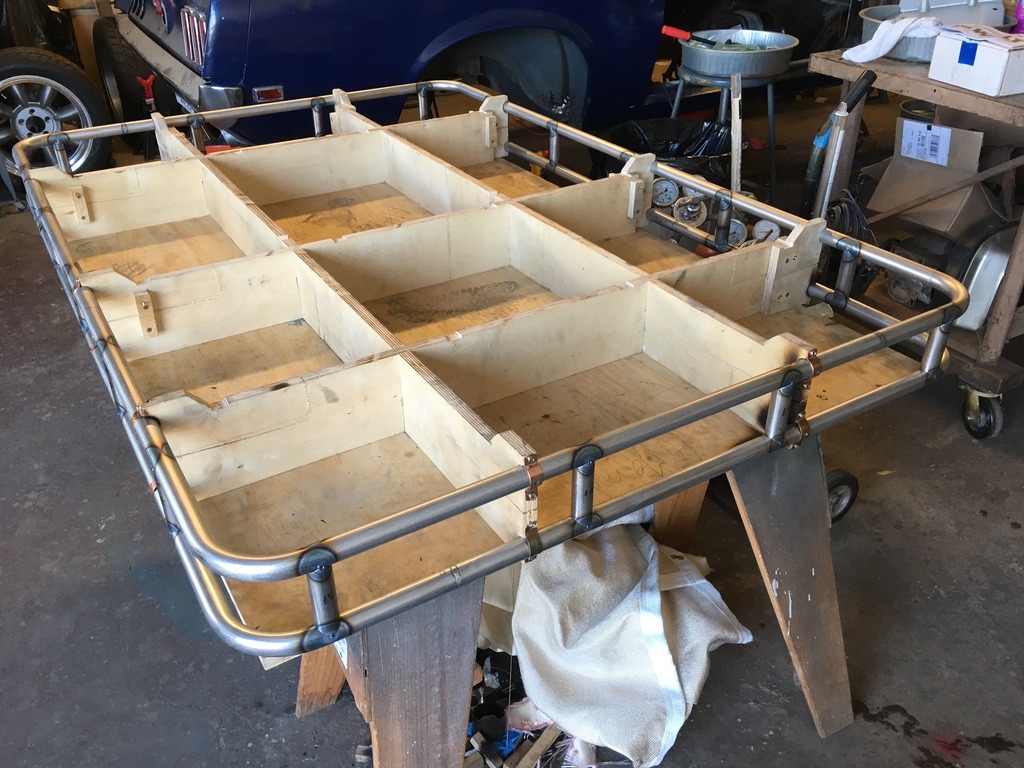
Frame complete. In hindsight, I should have built the floor and bottom rail together, then added the posts and top rail.
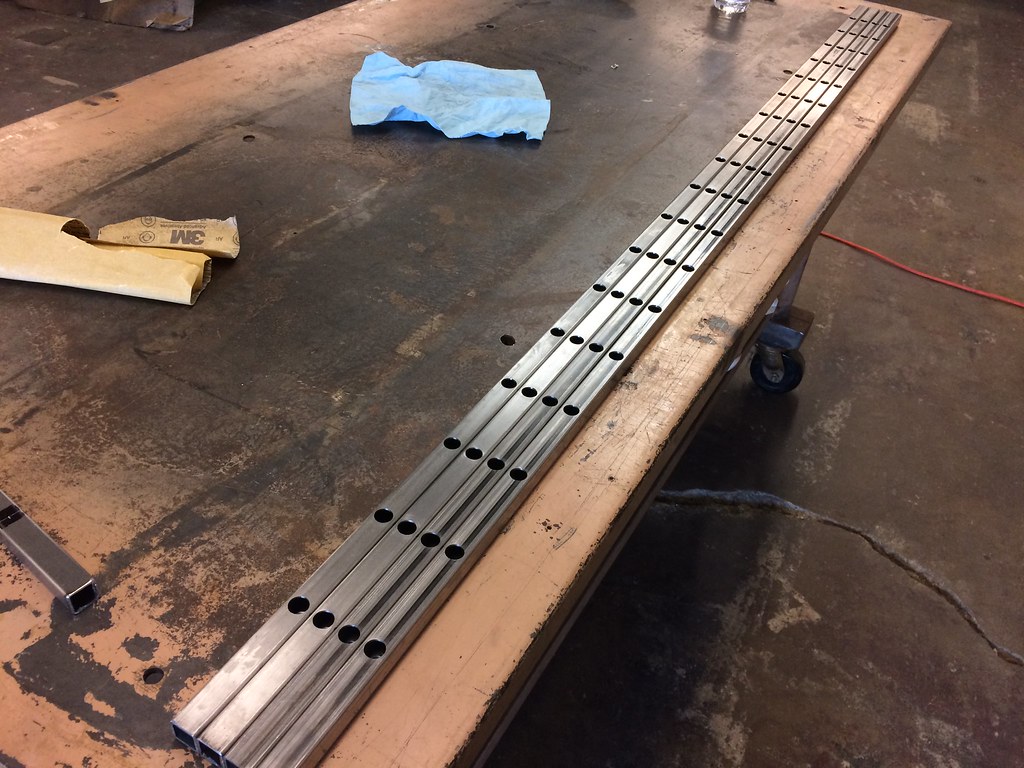
Starting the floor with the floor rails. This is the second set as the first was an abysmal failure. The holes had to line up absolutely perfectly or the round tube wouldn't slide through. The first time I clamped the square tubes together and drilled through, but even using the drill press the bit would wander and come out crooked on the other side. On the second attempt I drilled 1/8" pilot holes through one tube, then used that as a guide to pilot drill the others, then widened the holes to 7/16" with a unibit, then clamped them together and finish-drilled to 1/2".
Legs cut from .120" angle steel.
Stress test of a leg brazed to a floor rail. It passed.
Test fit of floor rails and feet.
Built a second jig to hold the the floor assembly as rigidly as possible.


The 1" tubing was welded, the smaller tubing was brazed.
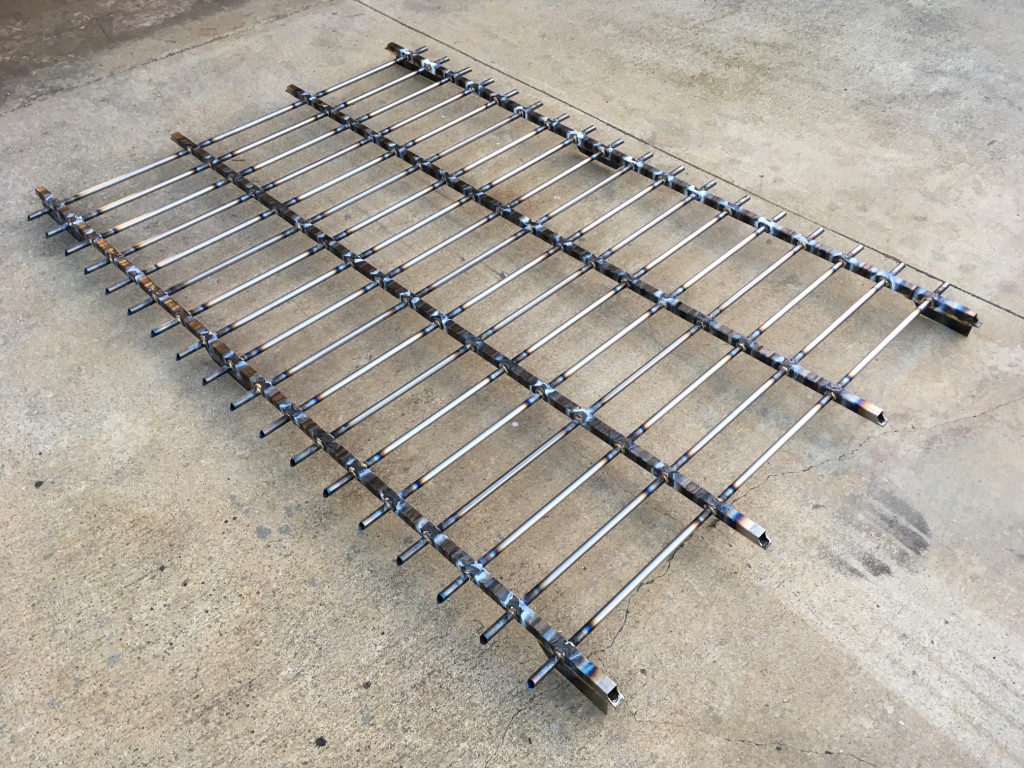
Completed floor. I thought I was clever by making the round 1/2" tubing pass through the 3/4" square and making the floor thin but rigid. It was extraordinarily complicated and difficult to get everything to line up, then warping was a problem. When I build the next one I'll make the floor out of 1" square, without the grid pattern.
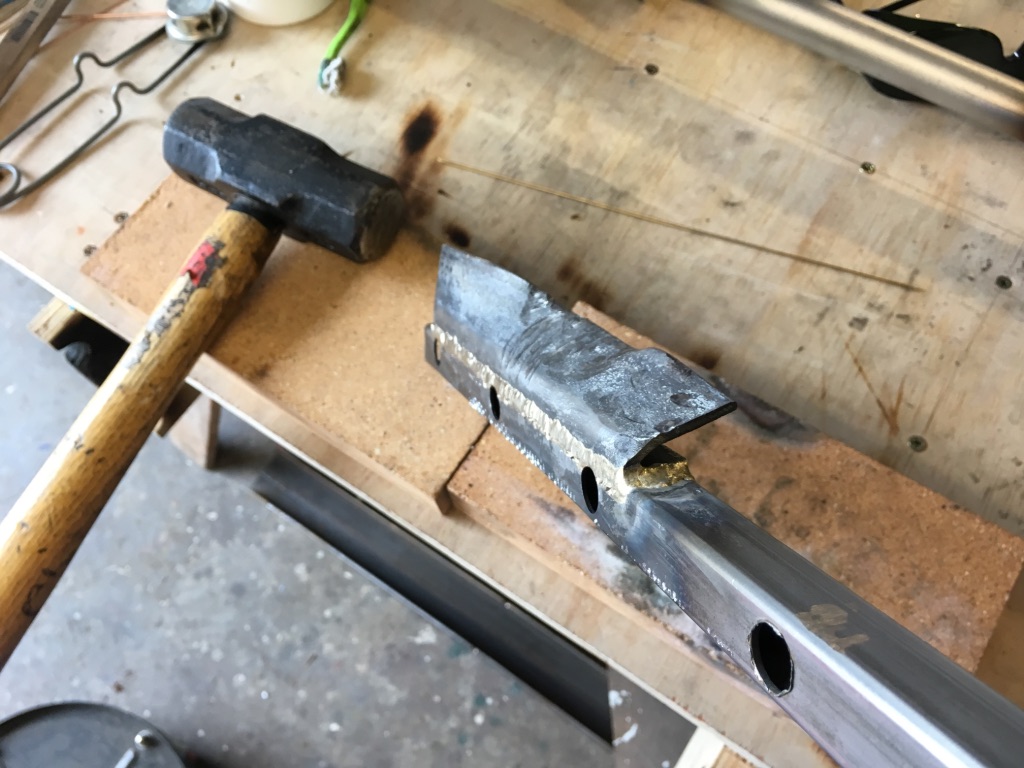
Using the vehicle was a welding platform. Feet in place. Using the stock roof rail bolt holes with studs. I don't know what Nissan was thinking - no two holes are in a line. They are scattered randomly.
Welding the legs to the feet. Doing this last was a huge mistake as the floor prevented making continuous beads, so I had to join lots of short welds which was not very attractive.

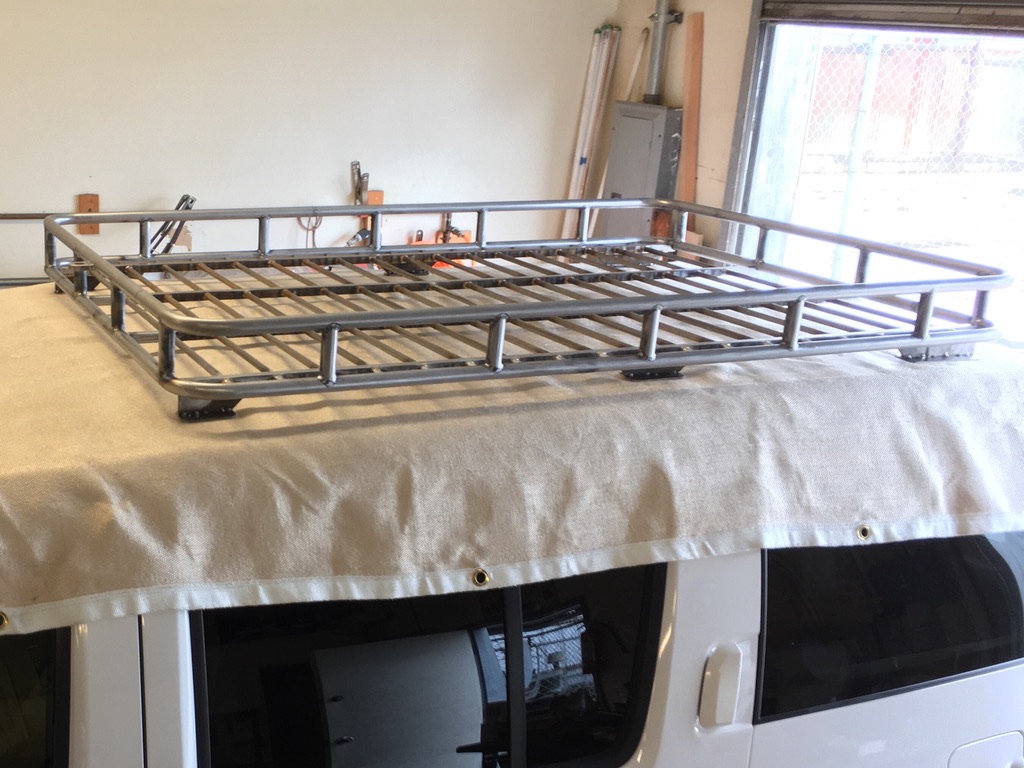
Off to the powdercoater

Torch welded. Fine texture powdercoat hides multiple sins.

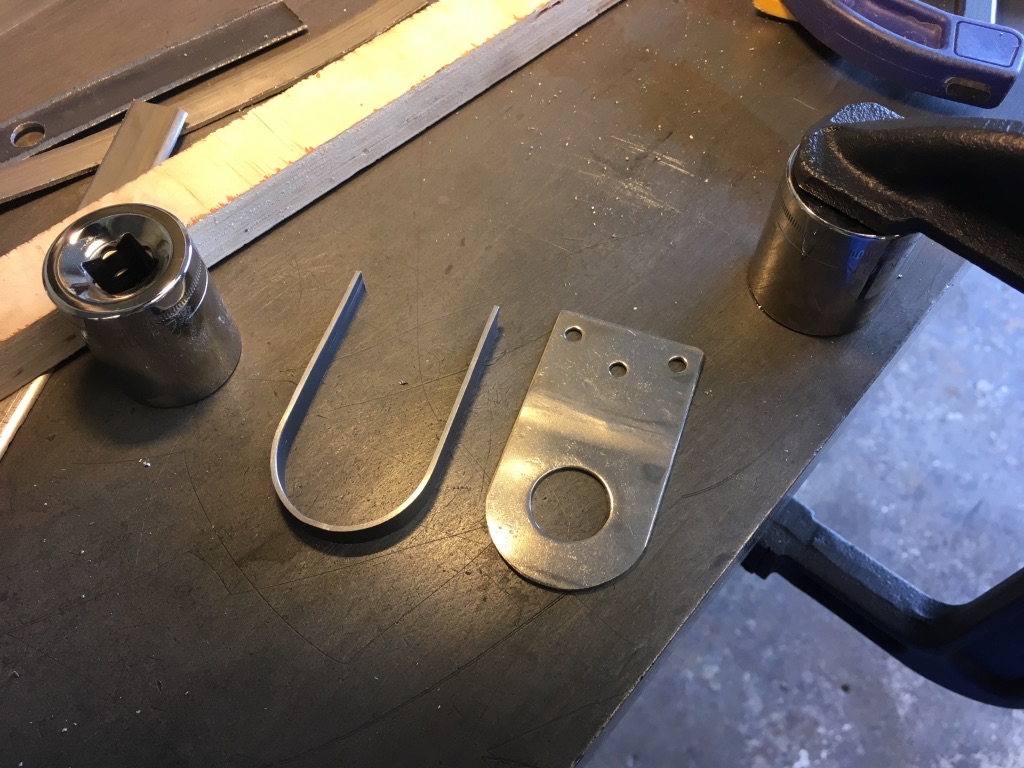
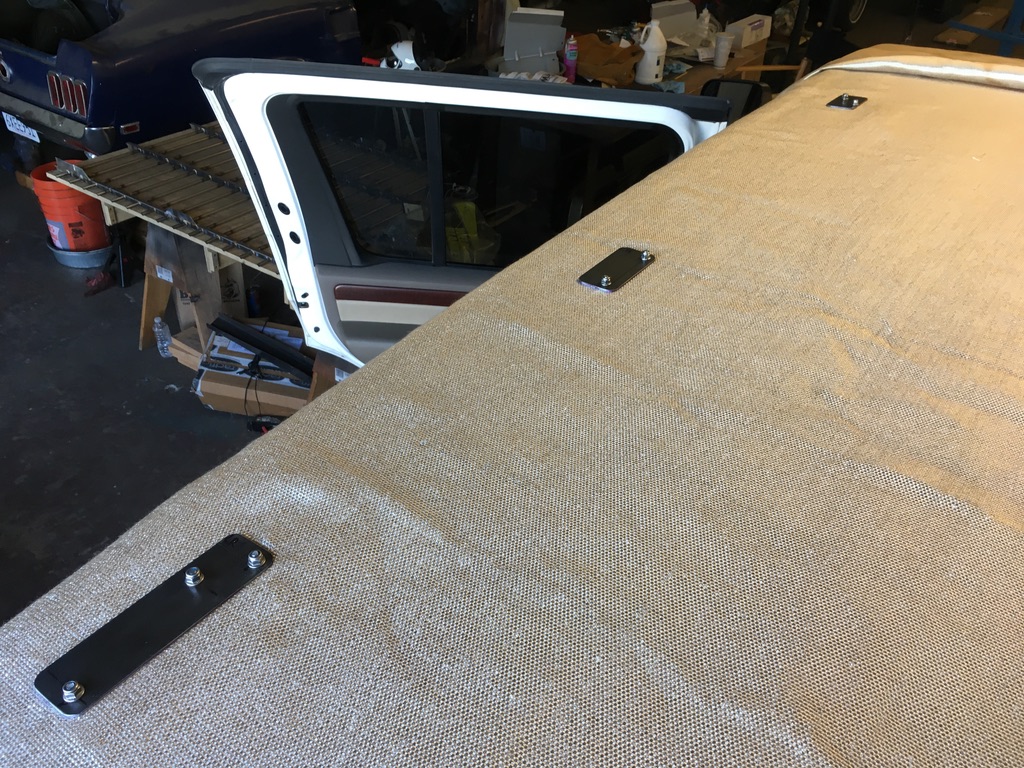
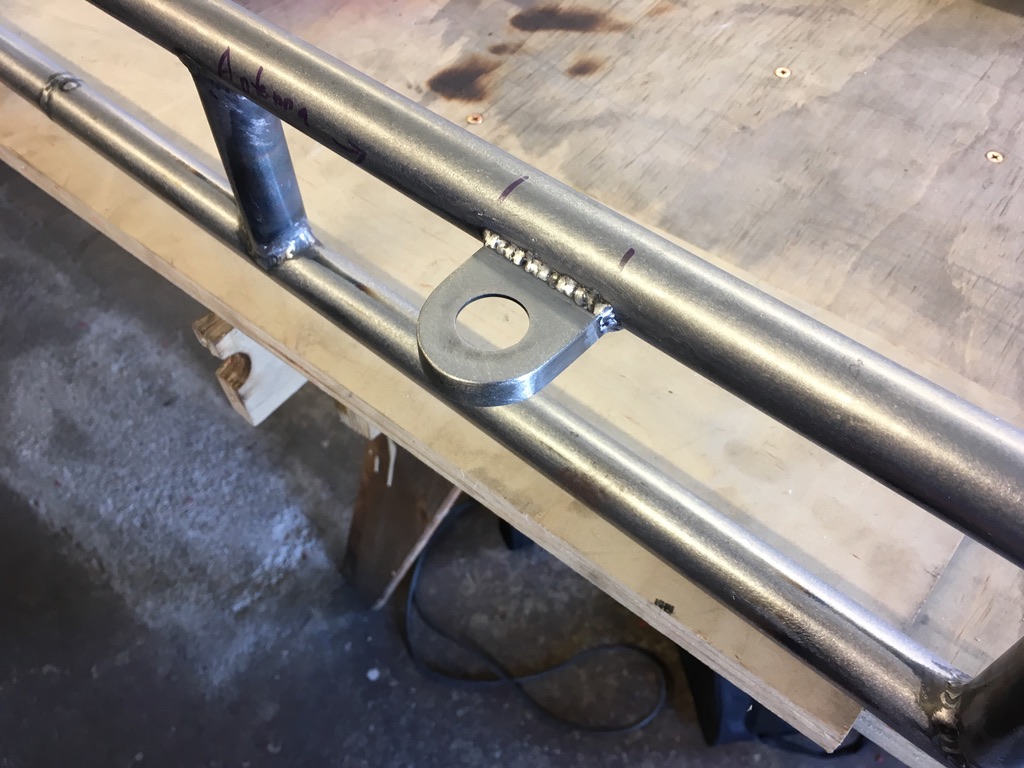
NMO antenna mount. Got a stainless square bracket, rounded it off and brazed on a lip to make it rigid.


Dremel off the powdercoat for a ground (that's why the stainless).

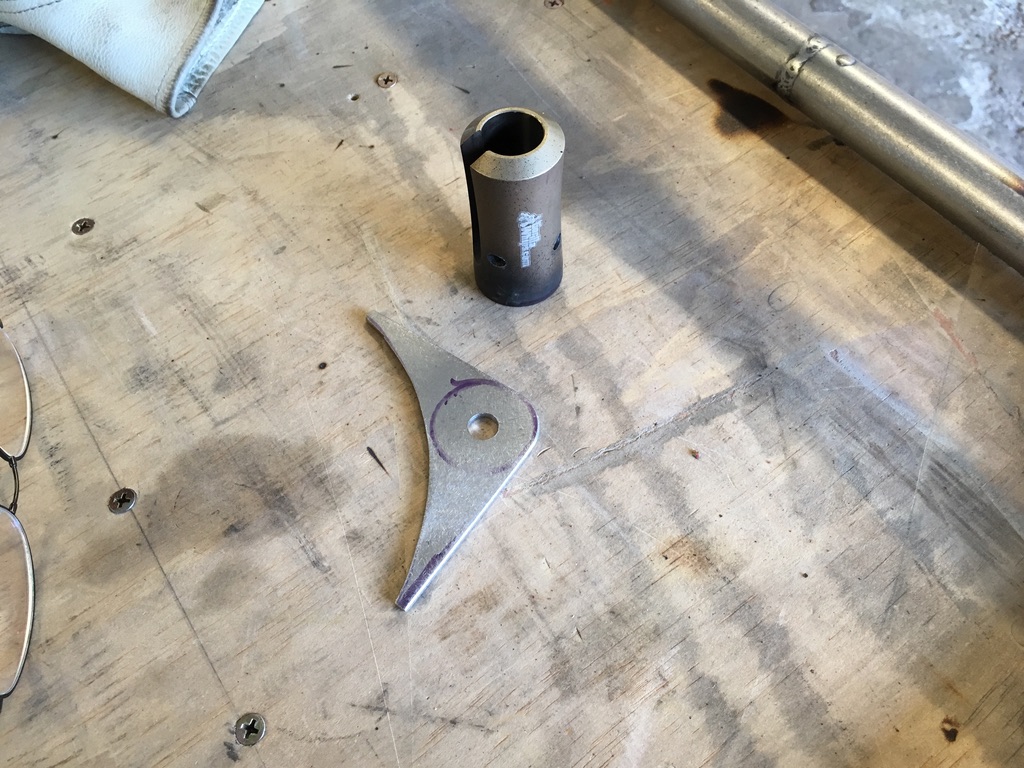
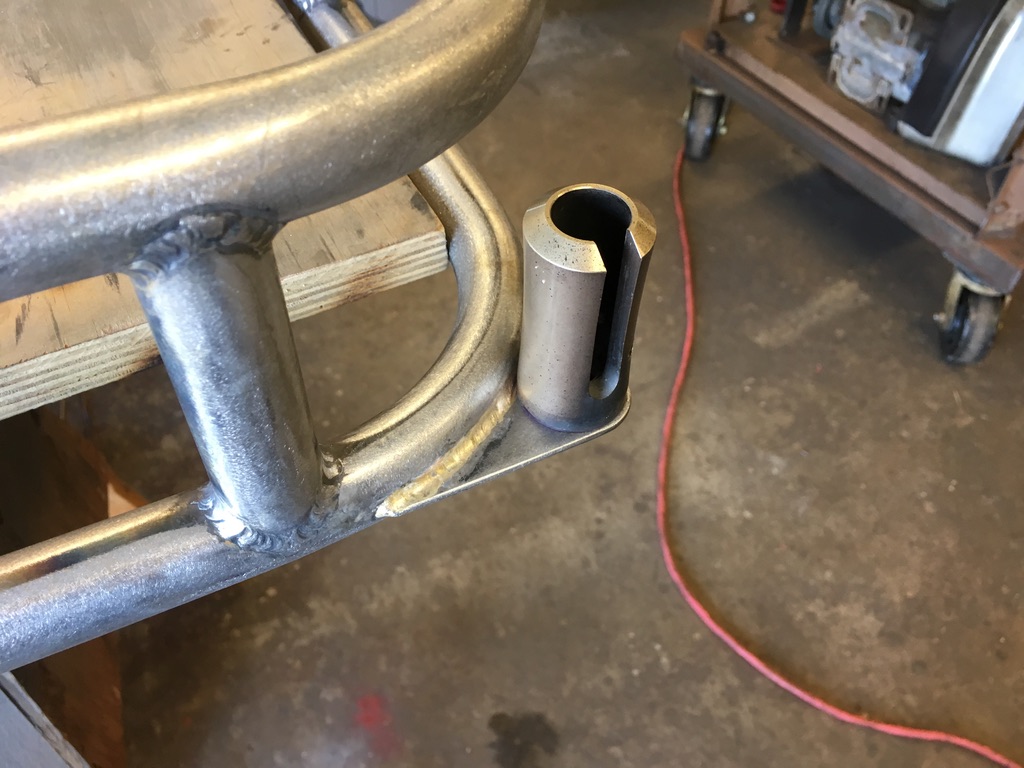
Gorilla whip mount cut from .120 stock.
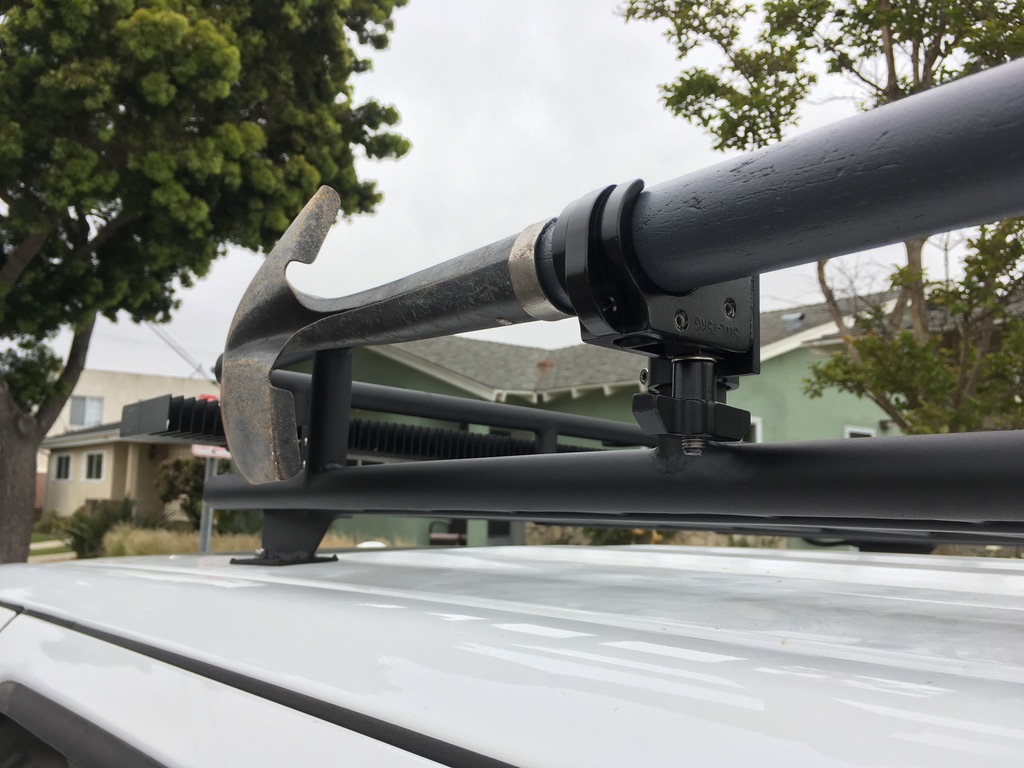
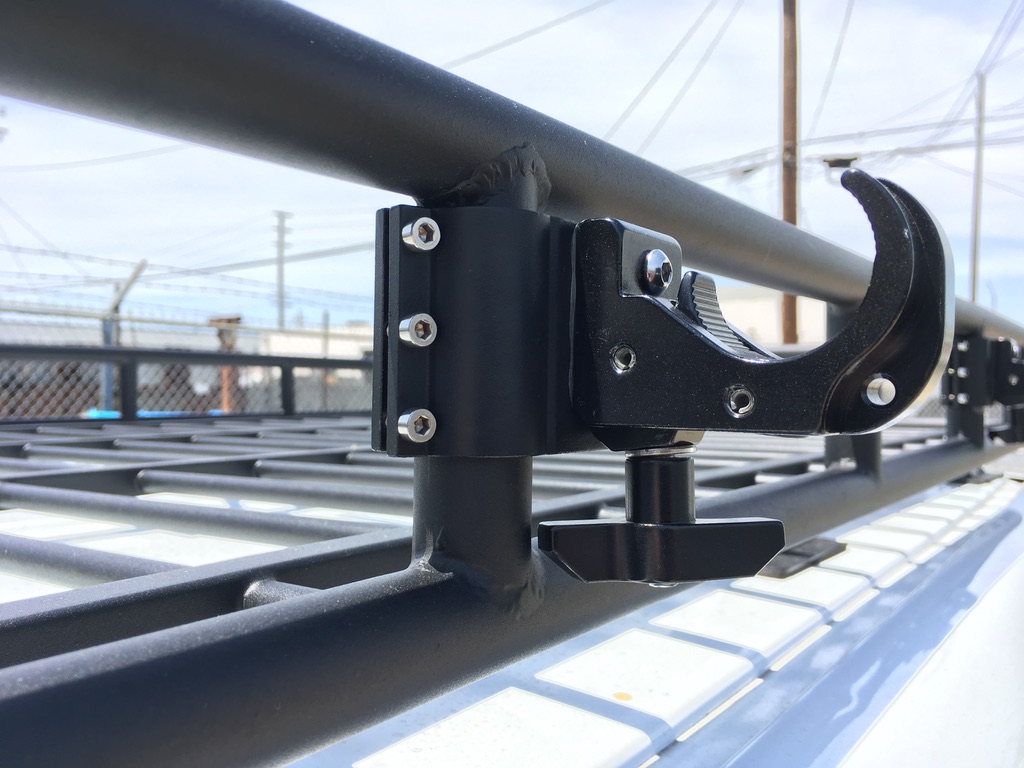
Best shovel bracket ever: a stage lighting clamp.
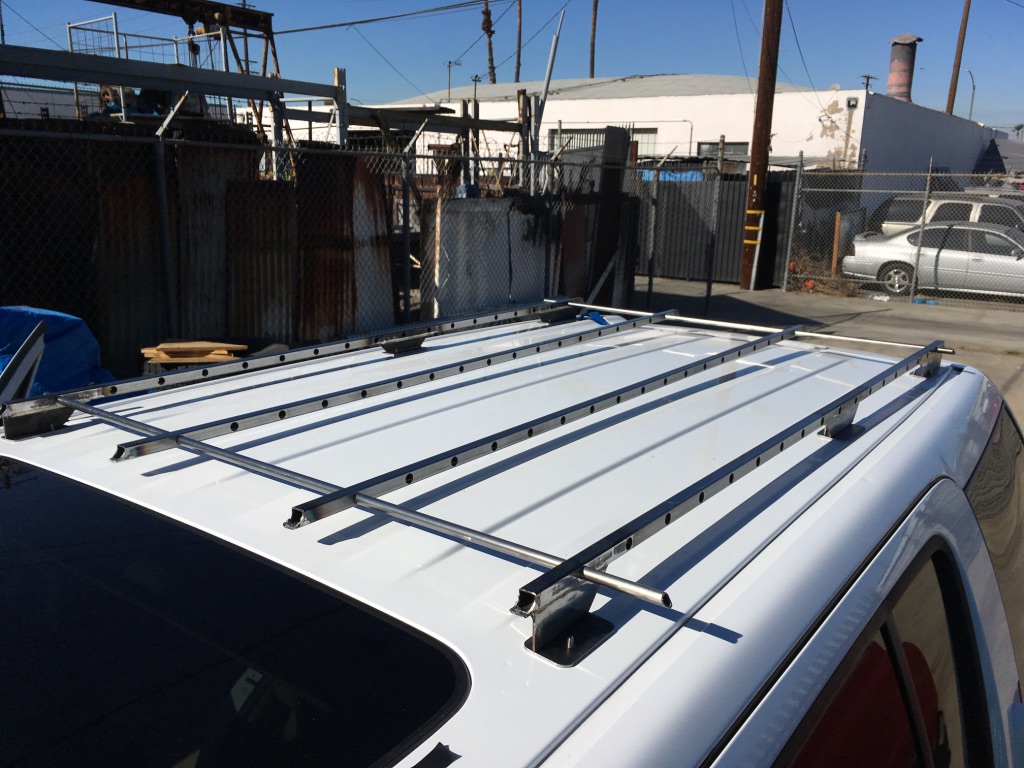
I replaced all the steel parts with stainless.
Then, just to make it extra hard, I decided to use oxy-acetylene (even though have access to MIG and TIG welders) and teach myself the lost art of torch welding. I ended up doing a mix of welding and brazing, just for the learning experience.
Taking my favorite design cues from Baja and Gobi, I made a full-size mock-up to see how it fit the lines of the car. By the time I finished this last month, 5" deep baskets have gone out of vogue in favor of 3" and flat deck platforms, but I camp several times a year and the big basket is so useful I can't give it up.
Making a mockup out of PVC in the living room, in 2014. The little holesaw guillotine worked great.
After painting, the mockup looked like the real thing. I really should manufacture these for the 99% who never actually put anything on their roof racks!
2016 - I decided to actually build it it, starting with a jig to hold the frame in place. It caught fire many times.
I had a shop do the bends. This was the only part I didn't do myself and I had to do quite a bit of tweaking to get them perfect. In hindsight I should have just bought a bender.
I bought a big floor-standing used drill press just for this project. Made a plywood jig to hold the tubing in place on the drill press, with a bit of tube on the end as a stop. It made perfectly consistent cuts.
The frame in the background was my first attempt and had to be scrapped because I tack-welded it in the jig, then took it out to finish weld - another big mistake - it twisted and was unfixable. So I had to start over with new metal, new bands, new posts...
Tack-welded.
After much research I bought a Meco Midget torch. Far more precise and maneuverable than an ordinary torch.
The gas weld bead has a very different look from a MIG bead. I welded about 90 of these joints - two frames @ 36 joints each, plus practice. I found it was best to weld half of the circle, let it cool, then weld the other half. This was complex - starting out with a lap joint which heats up really fast, transitioning into a corner joint which heats up really slow, then back into a lap joint, while rotating 180 degrees. I had to learn to change the torch angle to control the heat based on the joint as well as how many seconds had passed as the metal becomes pre-heated.
Frame complete. In hindsight, I should have built the floor and bottom rail together, then added the posts and top rail.
Starting the floor with the floor rails. This is the second set as the first was an abysmal failure. The holes had to line up absolutely perfectly or the round tube wouldn't slide through. The first time I clamped the square tubes together and drilled through, but even using the drill press the bit would wander and come out crooked on the other side. On the second attempt I drilled 1/8" pilot holes through one tube, then used that as a guide to pilot drill the others, then widened the holes to 7/16" with a unibit, then clamped them together and finish-drilled to 1/2".
Legs cut from .120" angle steel.
Stress test of a leg brazed to a floor rail. It passed.
Test fit of floor rails and feet.
Built a second jig to hold the the floor assembly as rigidly as possible.
The 1" tubing was welded, the smaller tubing was brazed.
Completed floor. I thought I was clever by making the round 1/2" tubing pass through the 3/4" square and making the floor thin but rigid. It was extraordinarily complicated and difficult to get everything to line up, then warping was a problem. When I build the next one I'll make the floor out of 1" square, without the grid pattern.
Using the vehicle was a welding platform. Feet in place. Using the stock roof rail bolt holes with studs. I don't know what Nissan was thinking - no two holes are in a line. They are scattered randomly.
Welding the legs to the feet. Doing this last was a huge mistake as the floor prevented making continuous beads, so I had to join lots of short welds which was not very attractive.
Off to the powdercoater
Torch welded. Fine texture powdercoat hides multiple sins.
NMO antenna mount. Got a stainless square bracket, rounded it off and brazed on a lip to make it rigid.
Dremel off the powdercoat for a ground (that's why the stainless).
Gorilla whip mount cut from .120 stock.
Best shovel bracket ever: a stage lighting clamp.
I replaced all the steel parts with stainless.