so i purchased this vinyl roller shade from home depot a few months ago:
http://www.homedepot.com/h_d1/N-5yc1v/R ... =203233421
and in case that url doesn't work any more, here's the other info:
Model # 37-3011-02 Internet # 100523447 Store SKU # 635221
55-1/4 in. x 78 in. Vinyl Roller Shade
and after looking it up they seem to have a 12mil version too. dang it i would have liked a little bit thicker one...oh well. the 6mil version i have is pretty much the same thing as a really thin shower liner.
*edit- totally go with the 12mil, don't get the 6mil. the 12mil is 100x better. the 6mil will pull tighter across the cargo area, but it's so flimsy it doesn't stand up to highway speeds with the windows down. the 12mil seems to hold up very well even at 80mph with the windows down and sunroof open.
you'll also need packages of:
2x #4x40x1/2" machine screws - round head combo
1x #6 lock washer
1x inside roller shade mount (as opposed to outside, they're sold next to the rollers if you to a store to buy them)
1x 3/4in x 48in wooden dowel
if i would have had all of this stuff on hand instead of having to go back and forth about 3 times to home depot, i think it would have taken about 30 minutes to install.
anyway, on with the show
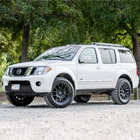
the cargo area we all love before:

i reclined the 2nd row seats as far as they would go and eyeballed where the roller should sit. then took the mounts and marked where the screw holes should be. i took out the latch and the screw that's behind where i think the cargo shade was probably planned to go. i pulled the bottom panel out enough so i could get my hands barely back there. i used a drill bit that was just slightly bigger than the screw so it would slide right through. i made sure to pull the seat belt out of the way when i did the drilling. i pushed the screw in from the back with a lock washer on it. in this shot i was using 1/4 screws which i found out would make the mounts just a little too far out for the roller to catch.

same thing for the other side. i didn't realize that when i was checking the fit of the roller that i marked the crap out of the other side. oops.
*edit - swap the sides of these two mounts, and flip the 'flat' head mount so the opening is towards the front of the car like this:

with roller installed

and done. the plastic pull thing thats at the bottom (if this were mounted on a window like it's meant for) was in no way strong enough to support enough tension or weight in this application, so i got the wooden dowel. width wise it also fits perfectly in the holes/slot at the back of the cargo area. i also had to cut part of the roller down so it would fit when it gets skinny at the rear.

all rolled up. it does just barely touch the rear seats when there's no tension on the roller, but when you're pulling it out or rolling it up it doesn't seem to cause a problem. yrmv


it does leave a small gap towards the back. i'm not sure how or if i'm going to tackle this. however i'm not too concerned about it as the whole point of putting this in is so i can remove the 3rd row and put a floor level sub box and storage back there.

i have not taken it for a windows down highway speed test yet. i did follow the instructions on the roller for basically charging the spring mechanism so you'd have more tension when you don't have it rolled out all the way. i'm also concerned about where i made the cuts with the scissors, i bet with the highway test and/or over time that will probably start to rip. also i did put a very small rip in it when i used a pair of needlenose pliers to rip off the tags and such from the roller, so be -very- careful when you're removing the stuff that keeps the roller rolled up.
it does take a little finesse to get the roller to keep tension while it's in the holes. basically you just pull pretty slow, angle the dowel and put the right side in first then put the other side in and you should have some pretty good tension on it.
i'll update later once i get it on the road with the windows down.